Rss

  • twitter
  • youtube

Archives for : MAME

Dedicated MACH 3 CNC Control Panel

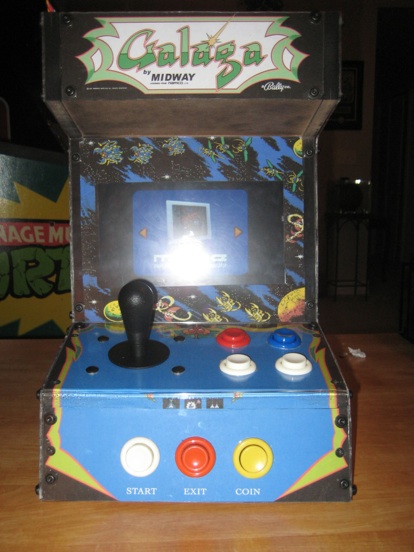
Yet again, its been awhile since I’ve posted anything on here! A lot has happened since! First off, I got a couple new toys, I picked up a vinyl plotter. This has been great for labeling things and just having fun. My other toy was upgrading my CNC Router to a bigger and faster machine. I picked up a 2×4 Warthog router, it took some work to get it running on Mach3, but has been worth it. I always liked how the industrial units had dedicated systems that used there own software. Made them cooler and so much more convenient IMO. But Mach3 is such a great easy to use piece of software that I wanted that as well. So here is what my ingenuity came up with!

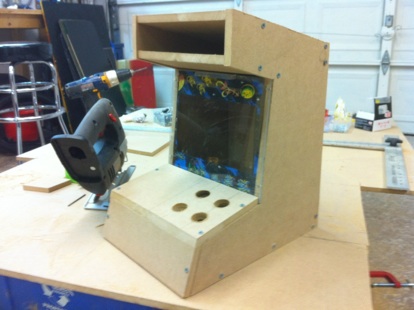
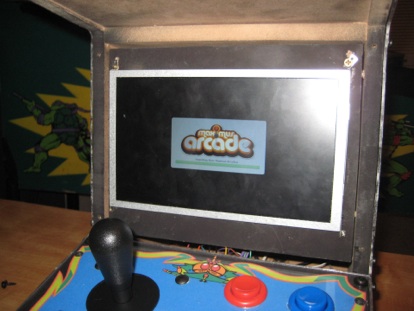
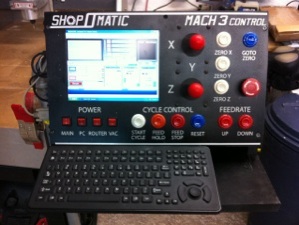
Its a pretty simple device really. All of the parts, except the “E-Stop” Button I had laying around. The Screen is just a 10” LCD I took out of kiosk system. All of the buttons and joysticks came from a box of old MAME parts I had laying around. I had a extra I-pac ( http://www.ultimarc.com/ipac1.html ) laying around, which basically makes all the buttons keyboard commands which Mach3 can see as a “hotkey”. More details later.

IMG_1761 IMG_1762 IMG_1760

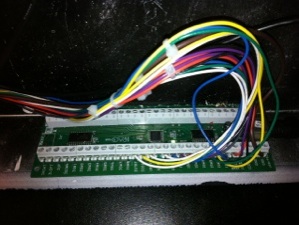
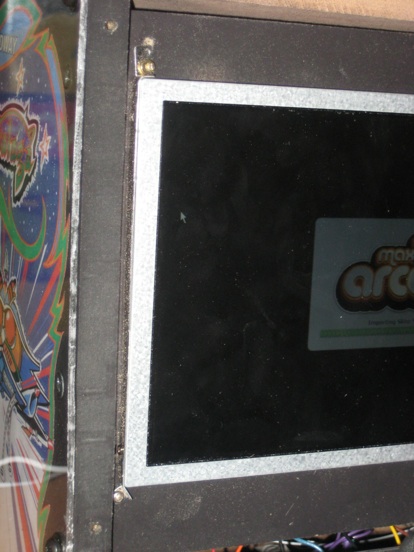
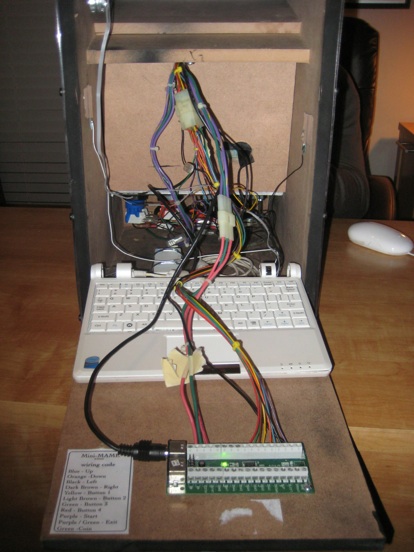
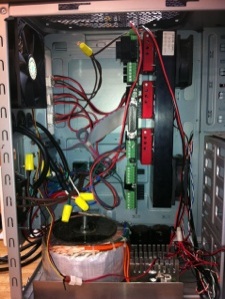
This definitely not the cleanest device I’ve come up with, but it will be cleaned up soon. The screen in the panel simply hooks up to the VGA output of the PC (the first one in the pic), Then I have a powered USB Hub in the panel that breaksout many USBs, this is for the Keyboard, Mouse, I-Pac and whatever else I may need like a USB stick. All of the buttons you can find on ebay if you search for “MAME Buttons” along with joysticks. They all hook into this I-Pac (this one is a bit big, but its what I had around).

IMG_1762

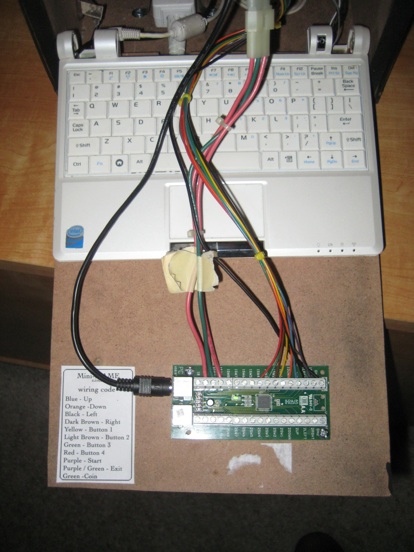
This nifty little device has screw terminals for all of your buttons. It even comes with a piece of software that allows you to program each button to each keyboard command if you’d like to be technical. This is a great way to add inputs to Mach3 without the need of a second parallel port. You simply need to download Mach3Screen ( LINK HERE ) and tell each onscreen button what “hotkey” (from the ipac) you want. Now you can add as many buttons as you can imagine for any function you want! The only hotkeys your going to want to actually program in the Mach3 app is your movement commands. Thats easy as going to System Hotkeys in Mach3. Mach3 will see all the inputs from the Ipac as keyboard commands, so it works FLAWLESSLY! You could even do limit and home switches if you’d want, but i wouldn’t recommend it.

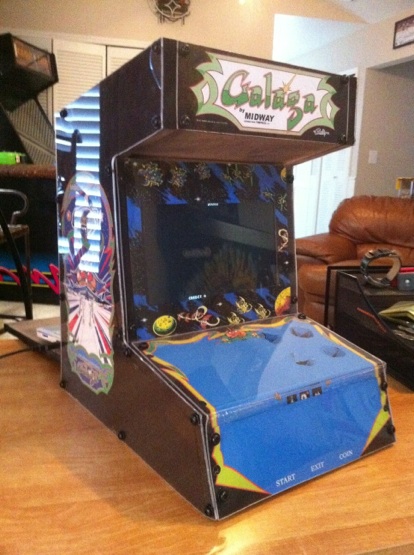
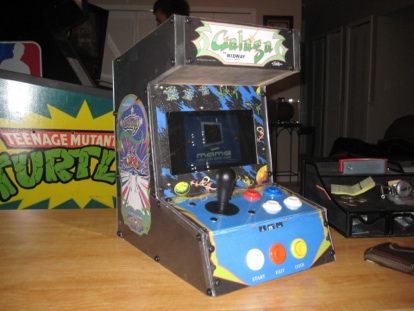
I went ahead and used my vinyl plotter to make all of the labeling for the machine to give it that professional look. I think it came out pretty darn good!

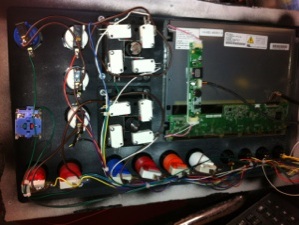
Now, the actual electronics for running a CNC (like my warthog) is a whole other project and is not going to be explained right now in detail, but i want to show you the inside of my motor control box just so you can see the relays and power outlets.

IMG_1763 IMG_1765 IMG_1764

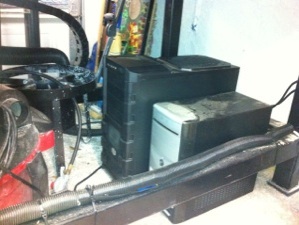
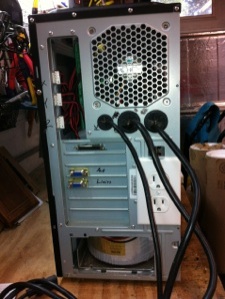
There are a few relays in the back which control the main power, the spindle and vacuum. These get there commands directly from the switches on the panel threw a normal 9 pin serial cable. I do this for a personal preference as I dont really want the computer controlling the spindle just yet. I was a bit worried about noise at first, but I haven’t had any problems.

The panel also got the keyboard added to it, which is a very nice keyboard, its all dust and water sealed and has the mouse built in. Also includes another 12 F keys which is excellent for giving commands in Mach3. Soon I will add a MPG Pendant to go next to the keyboard and make complete. Its all mounted to a steel bar that can easily swivel around.

IMG_1752 IMG_1753 IMG_1750

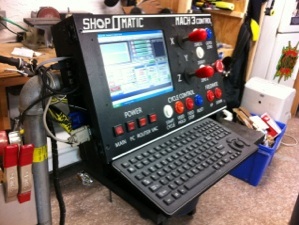
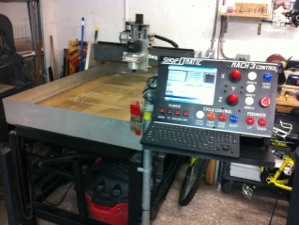
This really is perfect for anyone with a CNC Machine that wants to have it controlled very conveniently and not have to worry about dust and such getting into your keyboard and mouse


Mini MAME Cab from Netbook

Well this time I have done something that has done before, but I believe I have a improved version! A Mame table top cabinet running off of a netbook pc (Which is also battery powered!). This is a Christmas Gift to my Aunt, Uncle and there Kids. I have produced MAME Machines before, but this one was completely from scratch. My others I have taken original Cabs and stripped them empty and added all of the components (NBA Hangtime Cab). This one I used 1/2 MDF board and built this off the top of my head. I already had the netbook, so I based some of my measurements from that.

Supplies Needed-

-1/2 MDF (3/4 could work as well)

-Plexiglass

-Netbook (I used a eeepc 901)

-iPac 2 Player ( Link here to Ultimarc.com )

-Buttons and Joystick (Link here to Happ Controls)

-Label Paper (Full page @ local Office Supply Stores)

-Assorted Tools, Wire and Screws

-1 1/8” hole saw

First I started off tearing apart the screen on the netbook. This allowed me to get some exact screen measurements so I could be sure I would have the clearance. Sorry I do no have any pictures of this, and since every netbook is different, yours probably will be. Just take a quick google search if you not comfortable doing this yourself.

After determining the dimensions, I cut out my pieces with my MDF board. I made all of the pieces and predrilled the holes so it would not split. Then, using a router, I cut out the plexiglass using the MDF as my stencil. Plexi is hard to cut, so go slowly.

I left the back to swing open so it would allow me to work on it, but also to be able to access the body of the netbook. This gave me a mouse and keyboard always on inside of the machine. I also went ahead and predrilled the holes in the wood for the controls and joystick. (not all are done at the time of the picture). Also as a side not. Dont try to cut the plexi with a holesaw, doesnt work as well as you would like. I applied the plexi to the machine, then use d a dremel with a cutting bit. This acted like a mini router, and cut the plexi perfectly. I then removed the plexi and painted it black.

And then had to add artwork. I am giving this as a gift to my uncle and his kids, so I went with a Galaga theme. He has always said he wants a Galaga Arcade cab :-). The graphics I used are HERE (Arcade Art Gallery). But you can obviously use any art work you would like! I then reapplied the plexi over top of the graphics to give it a glossy look, but also protects the artwork from wear.

Then I added all of the buttons and wired them up. This is an easy process. Once you get the Ipac, youll see that they make it very user friendly. I went ahead and added molex connectors to make it easy to disconnect things if I ever had to. After adding the controls, I went ahead and wired up and mounted the LCD from the netbook. This was actually easy. I just took a piece of MDF, cut it to fit where the screen would go, then i set it back the same as the screen is deep. This allowed the screen to be flush. I used the stock mounting hardware and screwed it right to the wood.

I also cut a hole in the MDF right behind the connector of the LCD so I could easily run it right to the computer. I mounted the computer directly to the back of the cab that is hinged for access. There I also mounted the ipac and a wiring diagram. As you can see in the picture below, there is no room to plug a USB cable into the computer. So I soldered it directly to the board. Very similar to my LCD Apple Logo project. (link HERE). I also added a power button to the top of the cab and soldered it directly to the board. Makes it easy to turn off and on.

That is pretty much all that is needed! I am using Maximus Arcade (link HERE) to run the machine, which I highly recommend. Makes having multiple emulators and easy task! Now just enjoy! have any questions, send me an email!