


Edition XBOX ONE Replica
All my design files are available for free!
Download STLs and Laser Files HERE
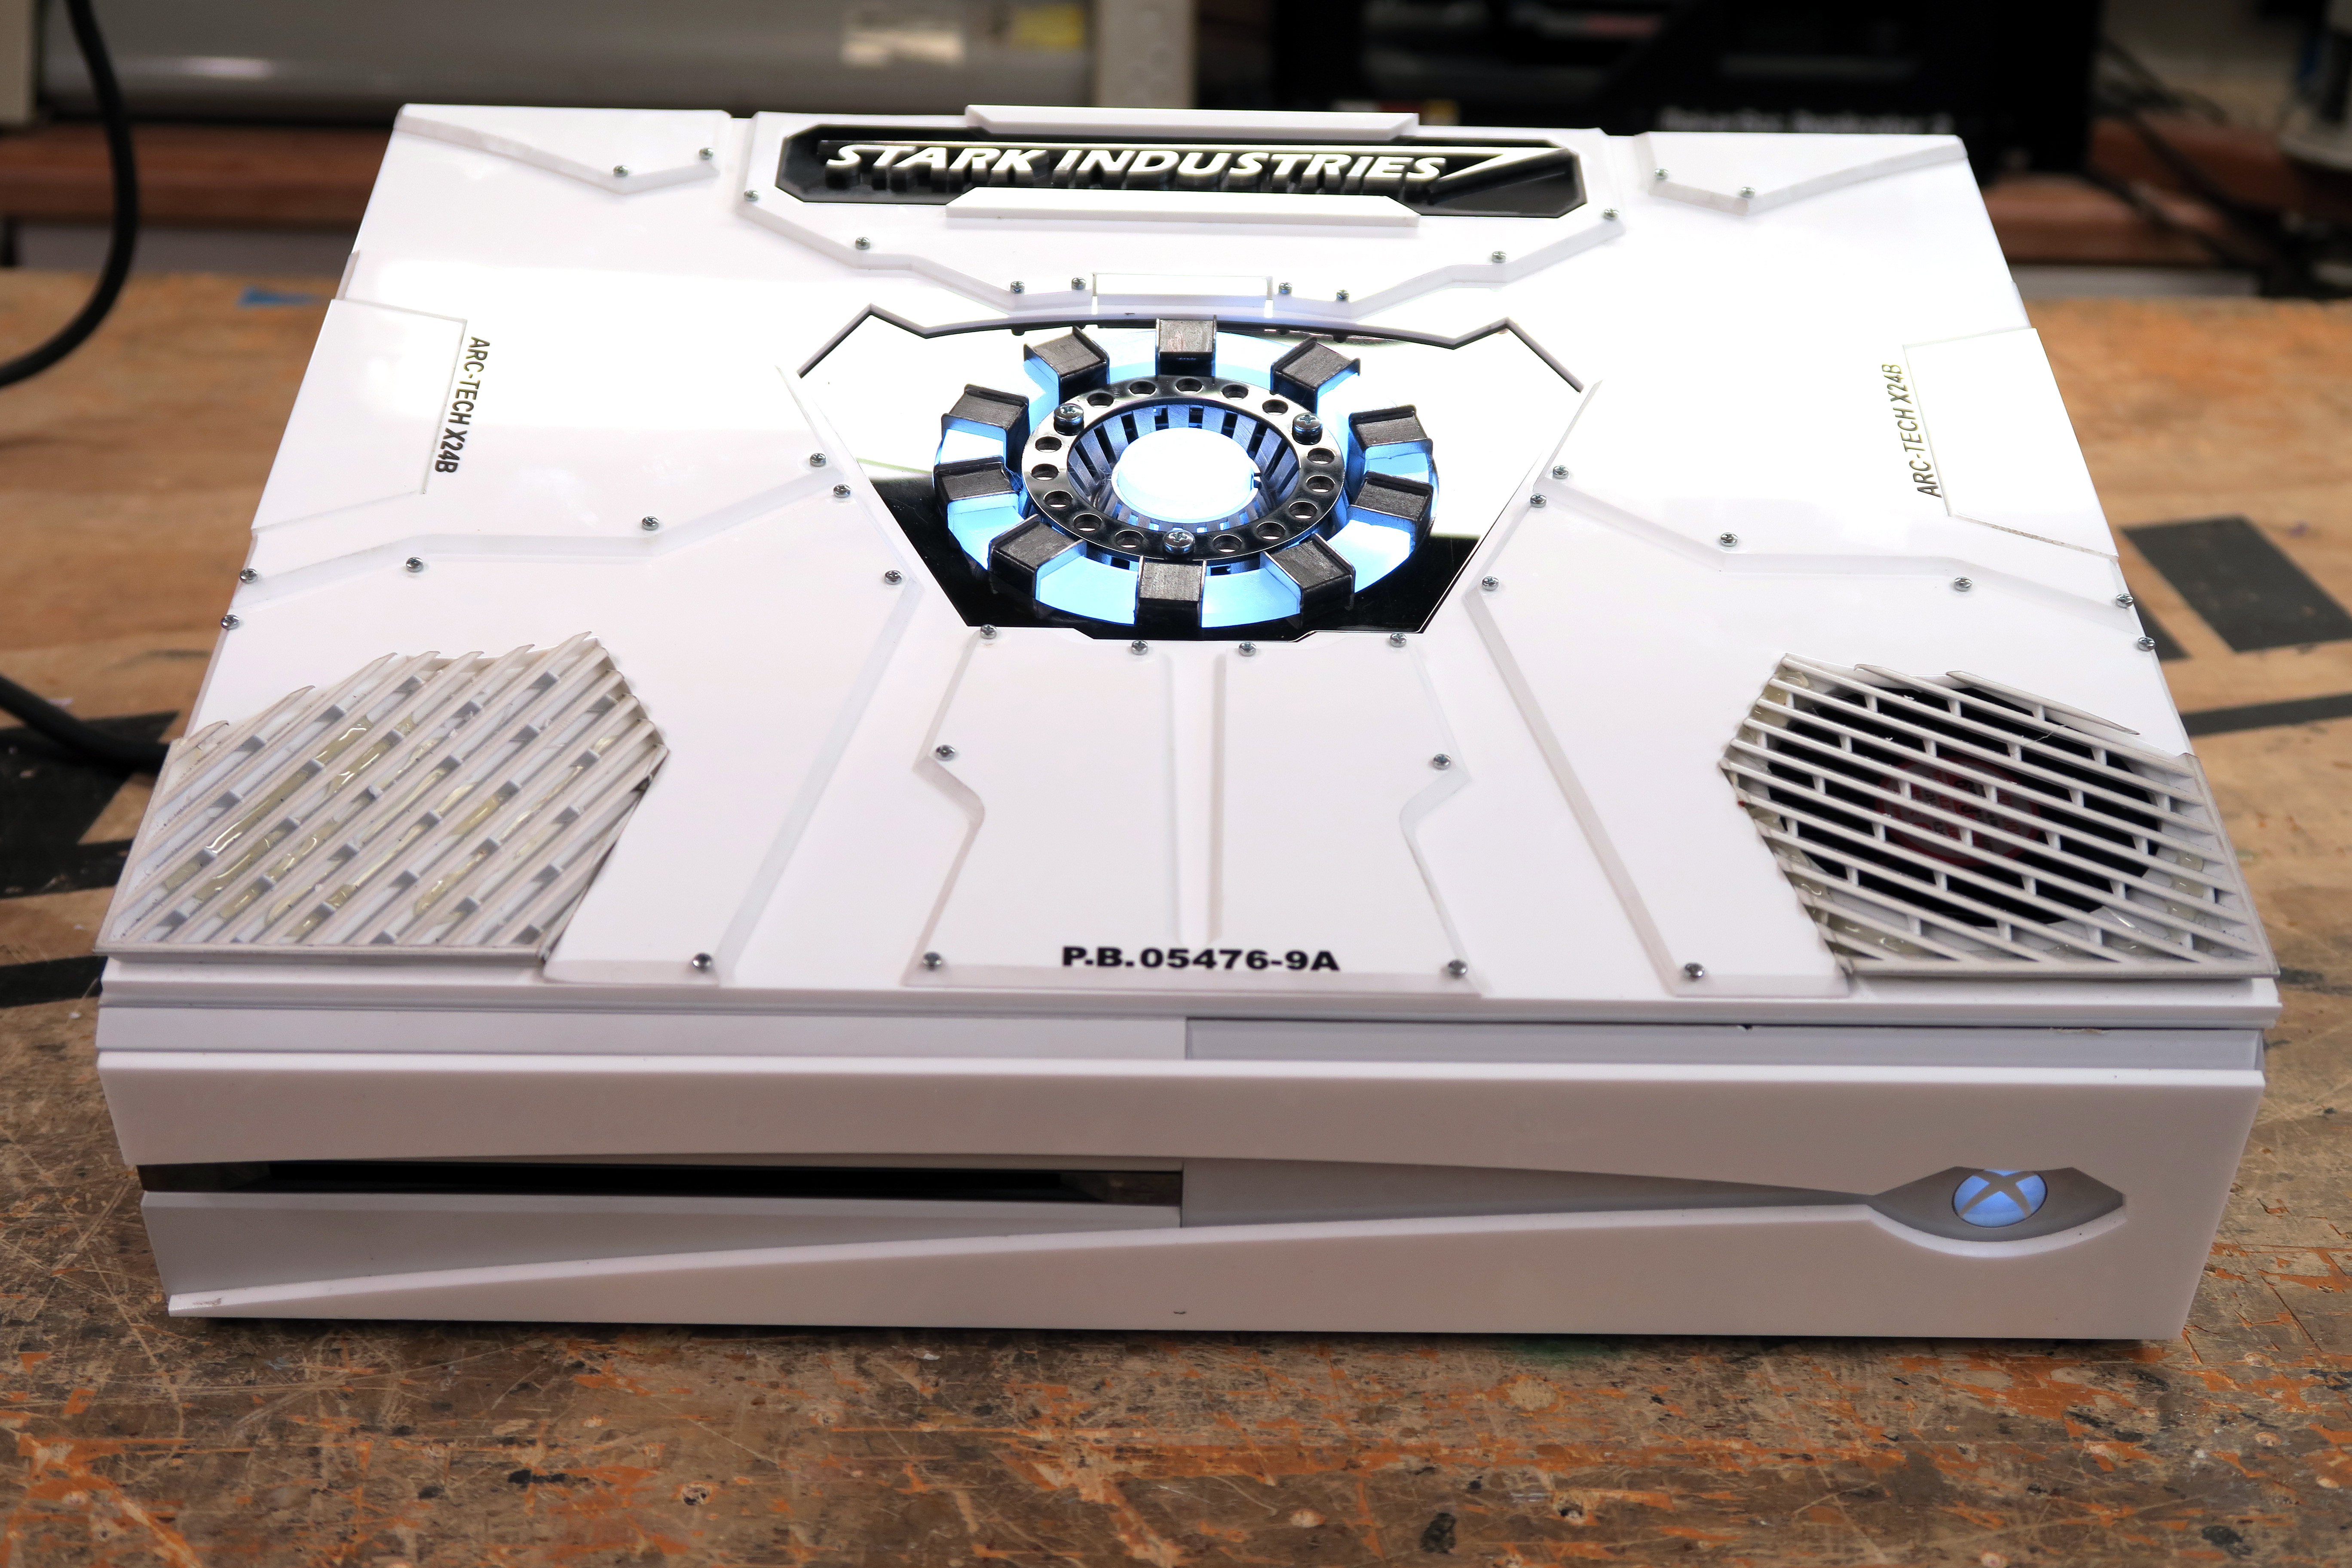
I am sure all of you have seen that gorgeous Stark Industries XBOX ONE that was a giveaway over seas somewhere and was unable to buy… The one that was a tease and made you want something you just could not have… No? Well here it is…
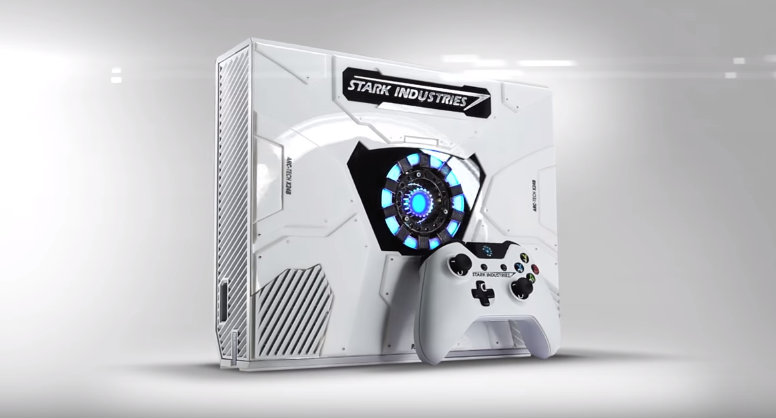
This was an amazing XBOX ONE that was stated to be designed by “Tony Stark” himself. I mean, he is the only one with a chest sized arc reactor correct? Well this XBOX was almost as unobtainable as an Arc Reactor itself. It was a giveaway and could not be purchased. Well.. I wanted to make one myself and see how close I could get to it!
I purchased a white XBOX One (not a slim model, since the original wasn’t a slim) and got to work designing the system. The first problem was of course not having a huge vent on top for airflow. I am still not exactly sure what they did to solve that problem, but I had my own ideas. You can see in the video above everything I went through to figure it out. I basically installed 7 fans to make up for the one large stock fan. 6 of them directed air from one side of the heat sink to the other. They 7th was a larger fan that I had to push air out the bottom right vent that was part of the design.
Now I started to design the acrylic and the Arc Reactor. This was pretty straight forward as I simply used Adobe Illustrator to redraw all of the shapes. The Arc Reactor was designed in 3D and printed as well. But the bottom vents were interesting to me. I could of course 3D print them, but after looking at the original I realized they simply cut the stock XBOX ONE Vent into the right shapes. So thats what I did. Threw it into the laser cutter and it fit perfectly into the design (I did have to repaint them since the laser left an ugly burn on the plastic.
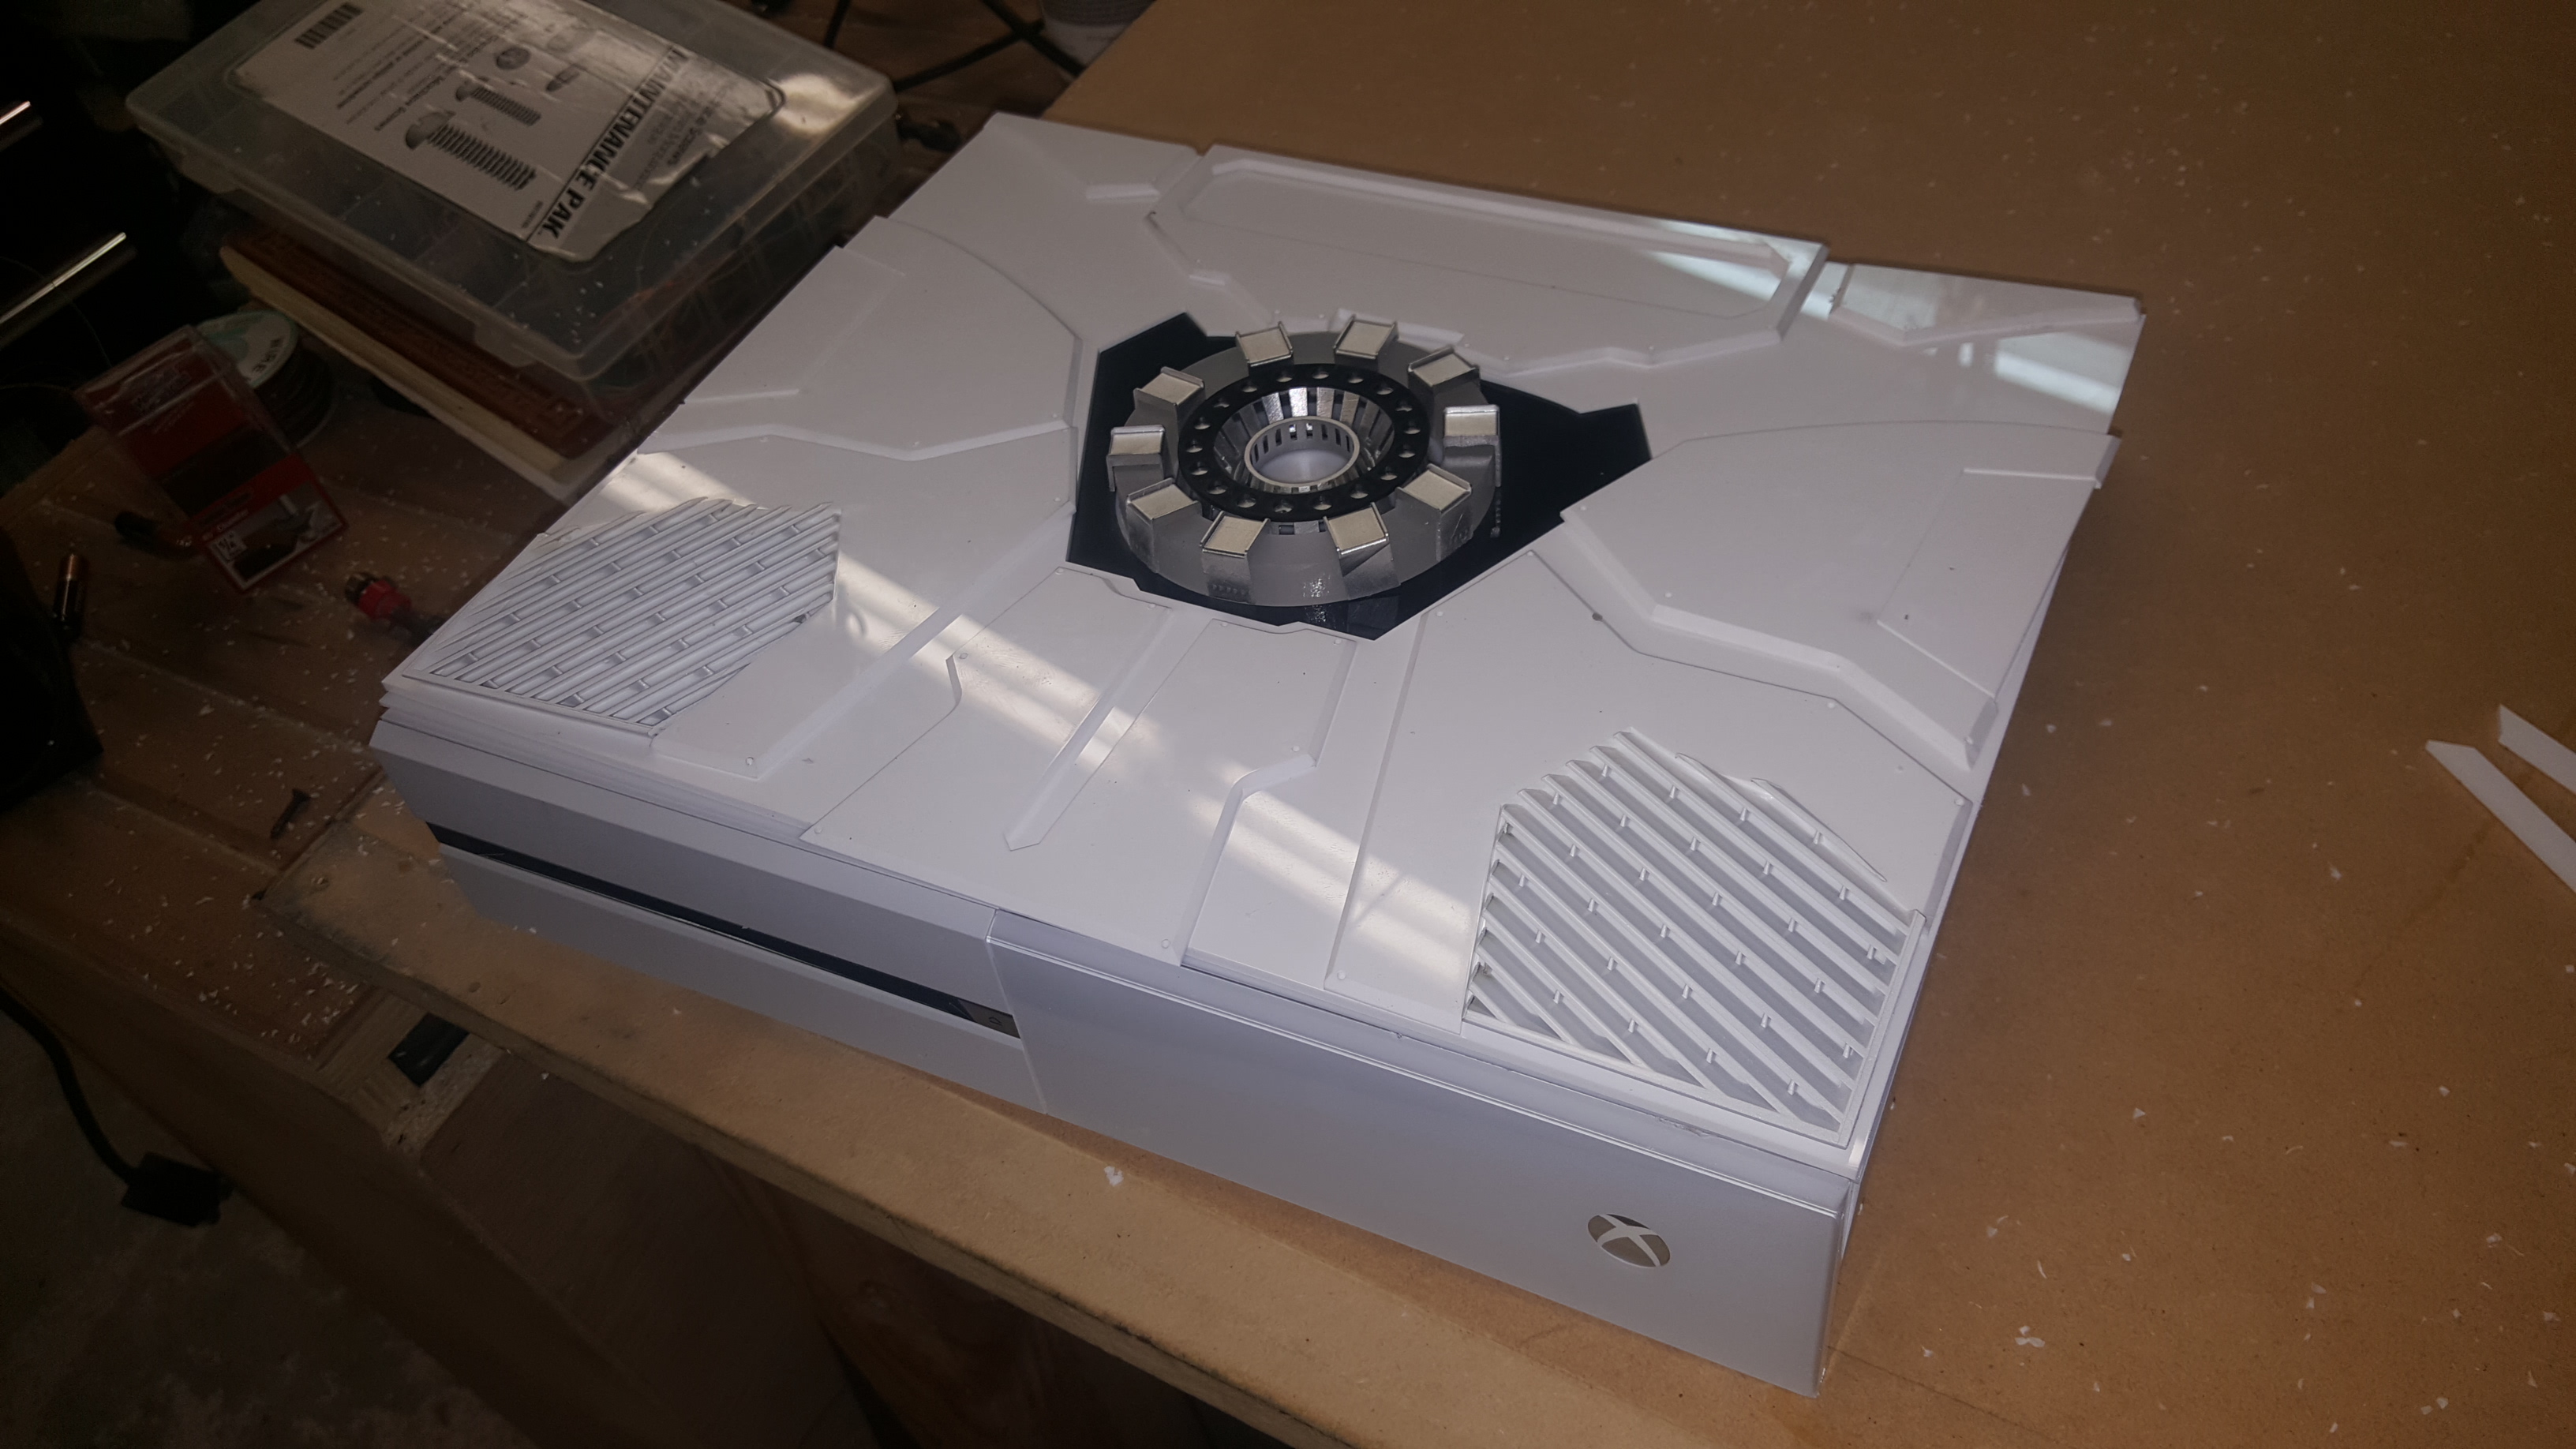
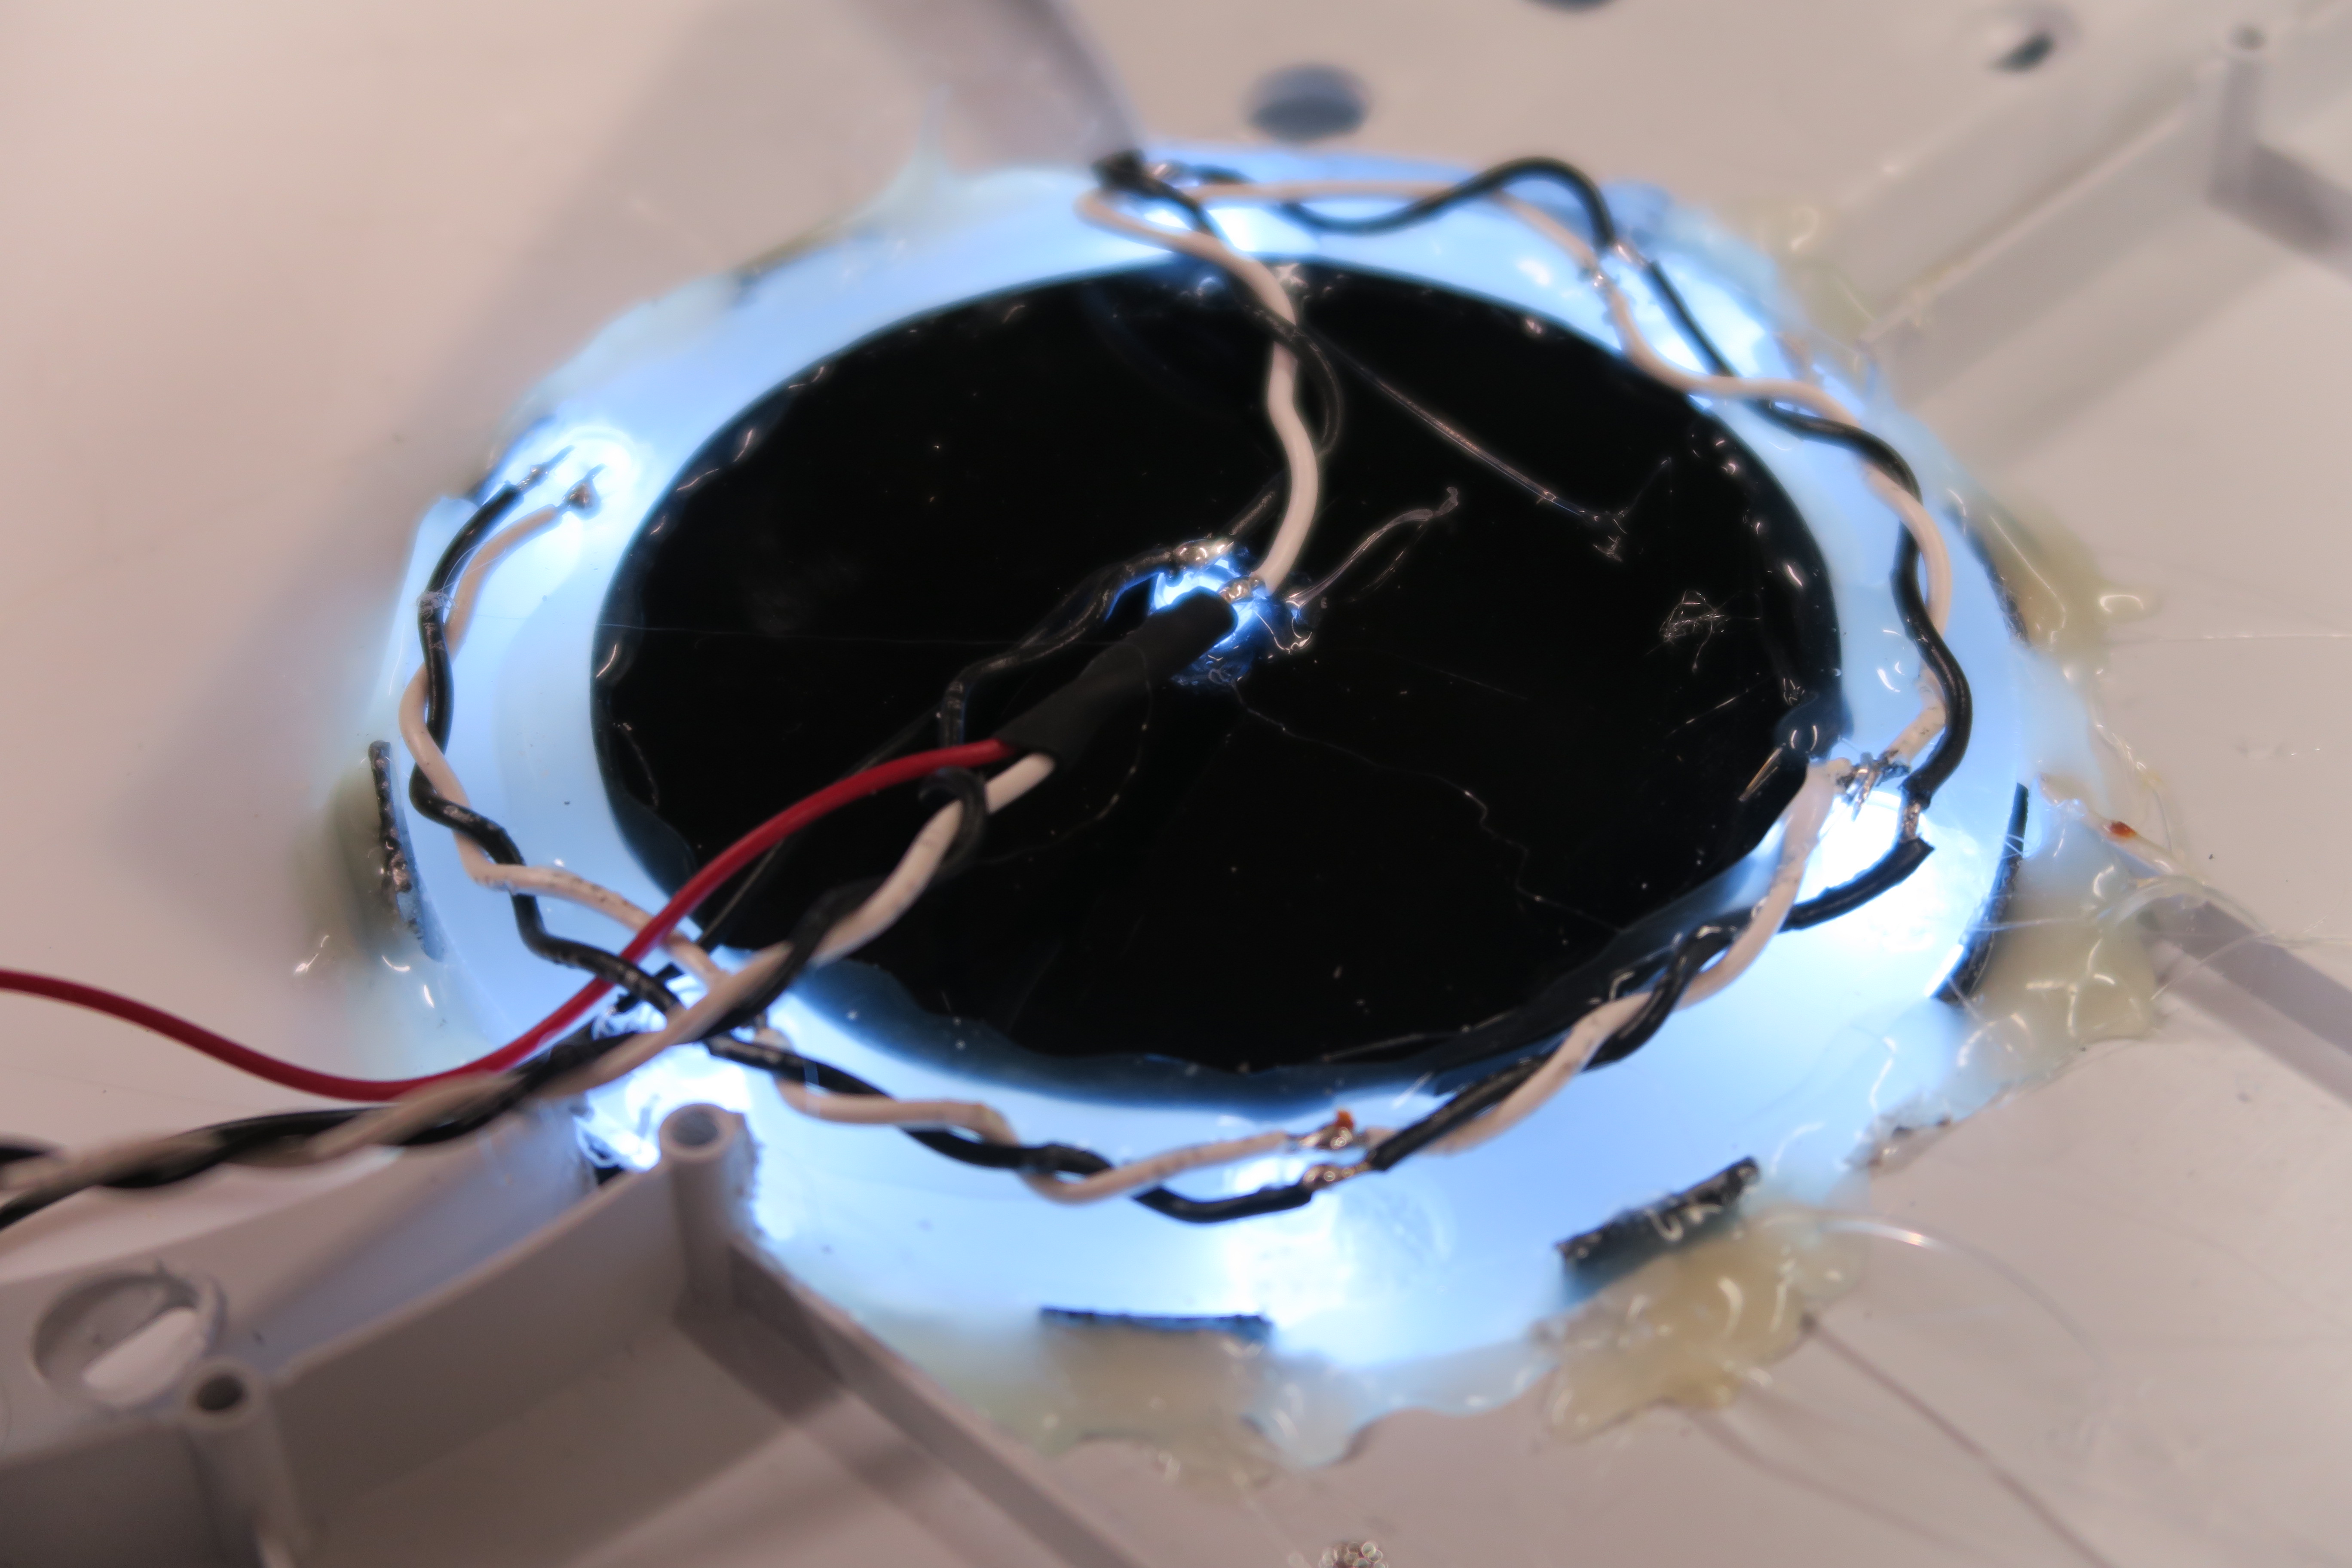
After making sure all of the parts would fit nicely on the system, I went ahead and started glueing them using an acrylic solvent. This basically chemically bonds the material to itself. I then put in the screws that were more for looks than practical. The Arc Reactor was painted up, LEDs installed and inserted into the middle. I used 12v power from the fans to power the LEDs.
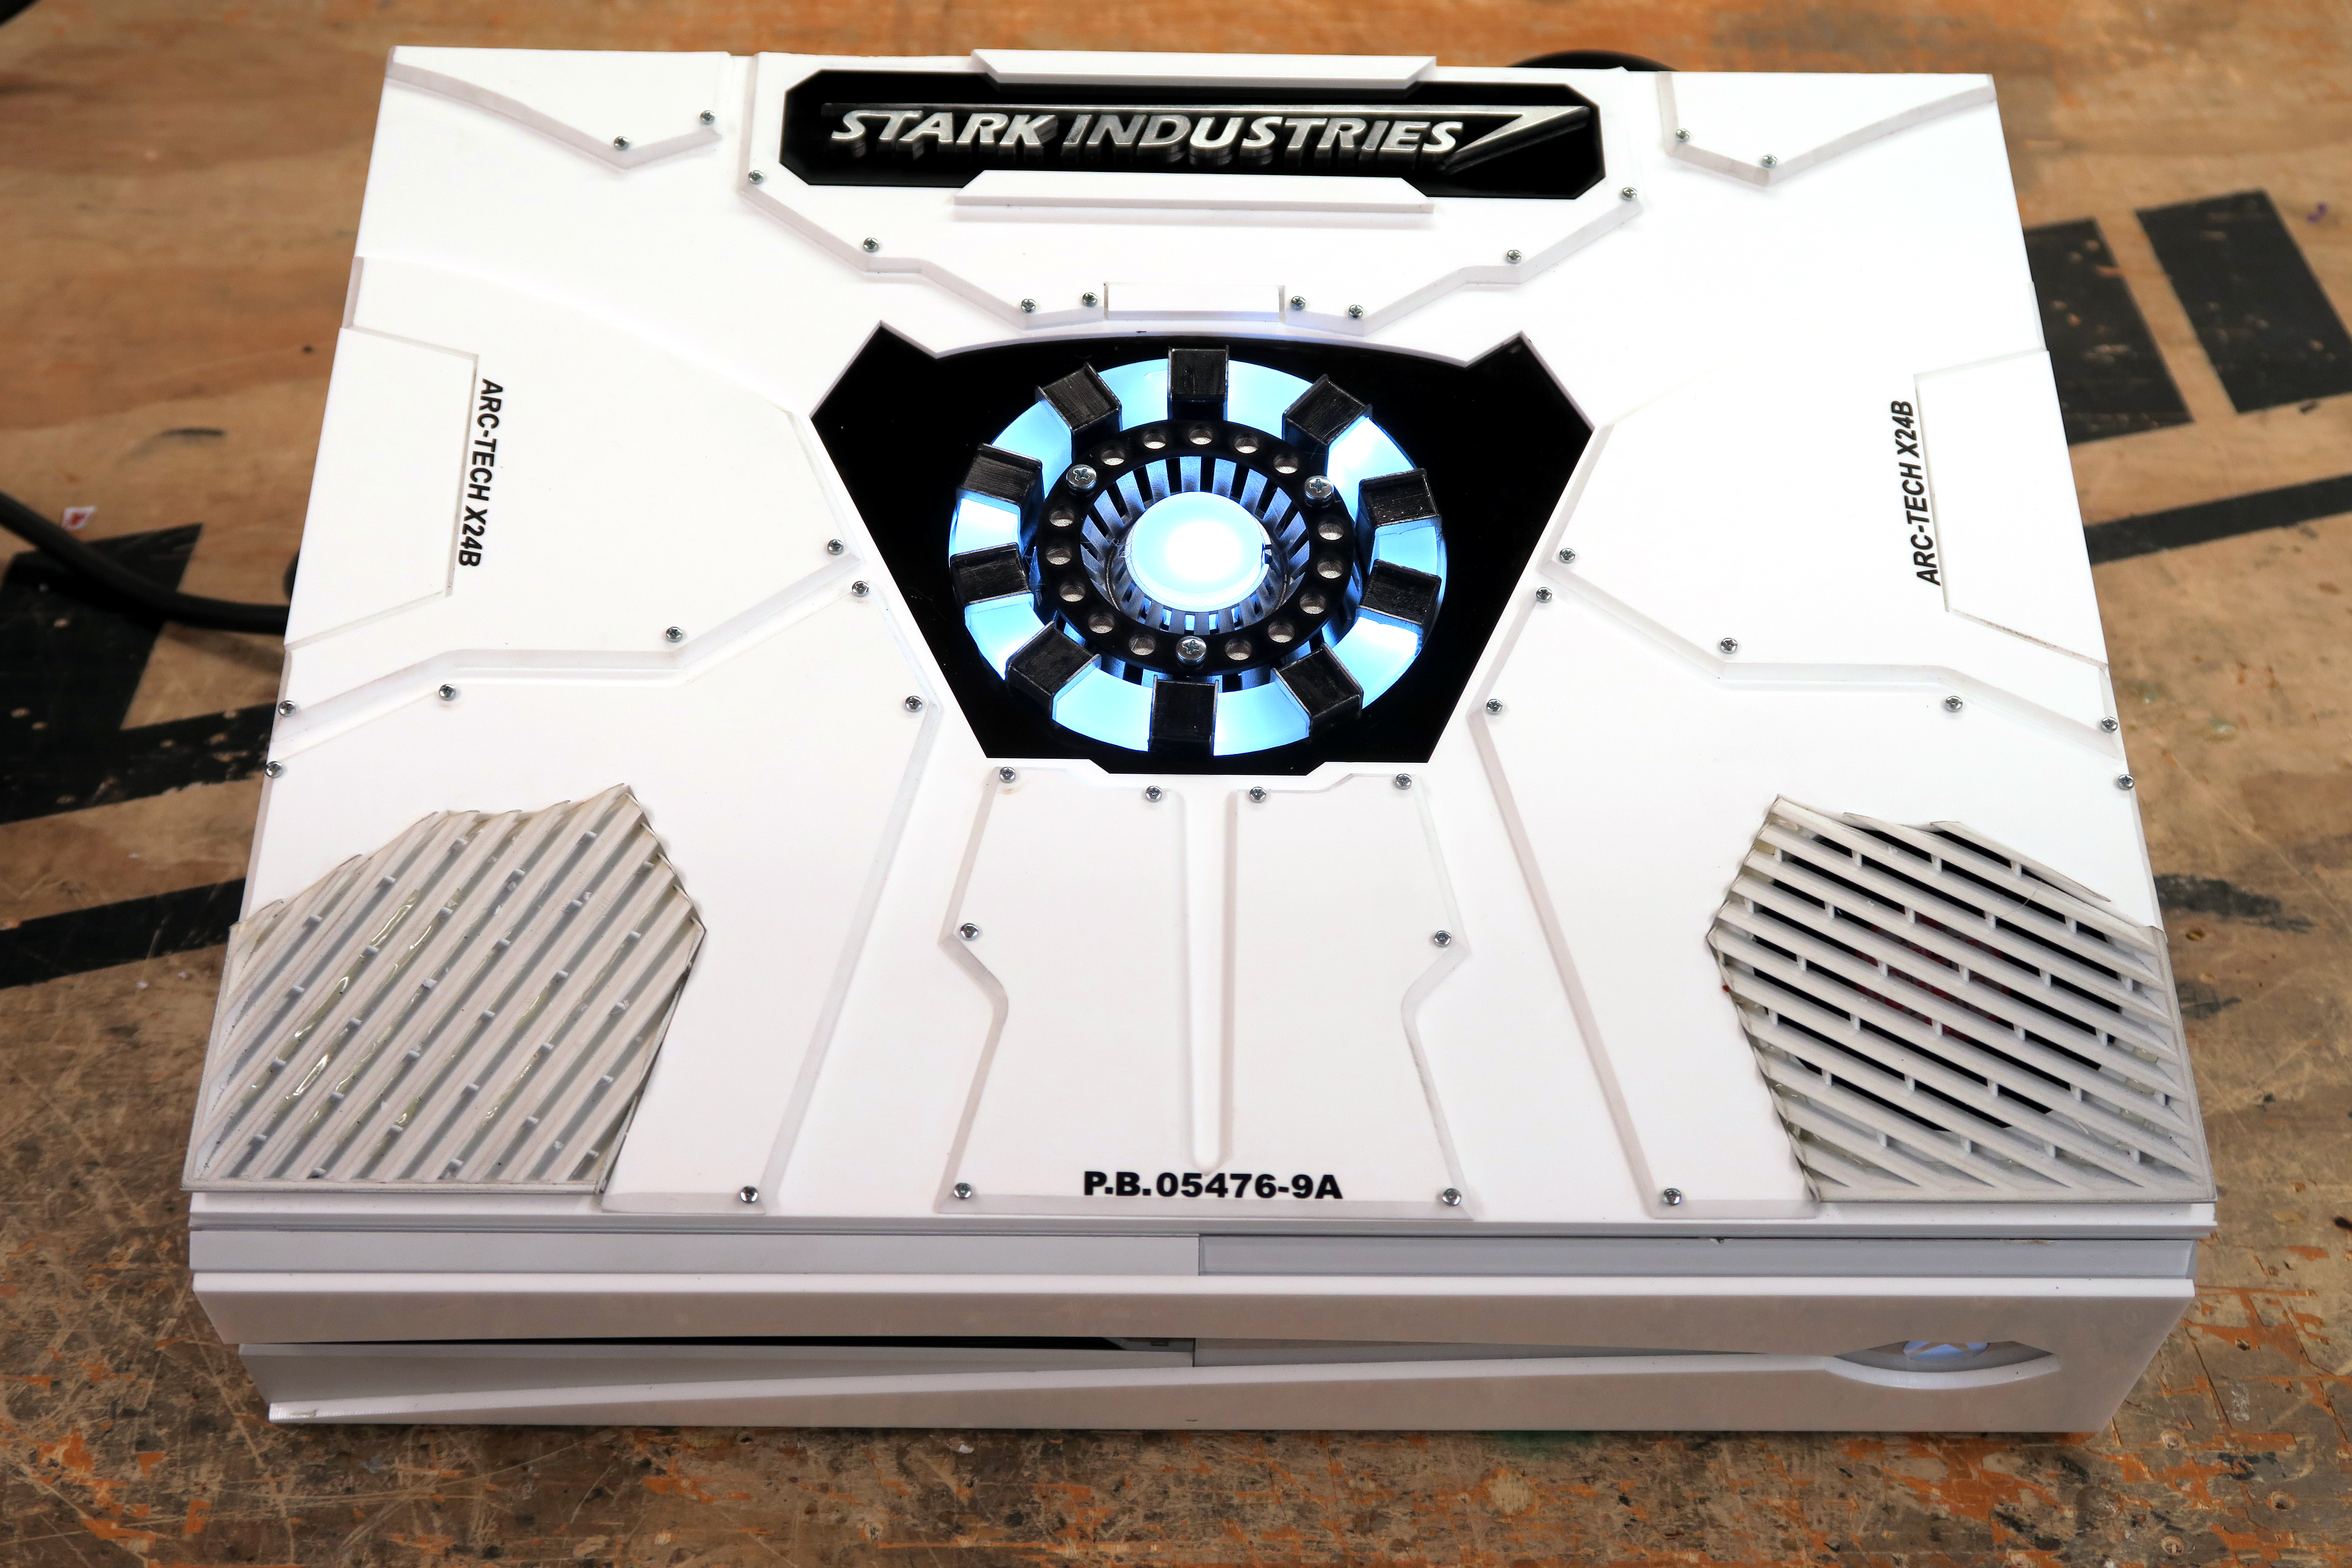
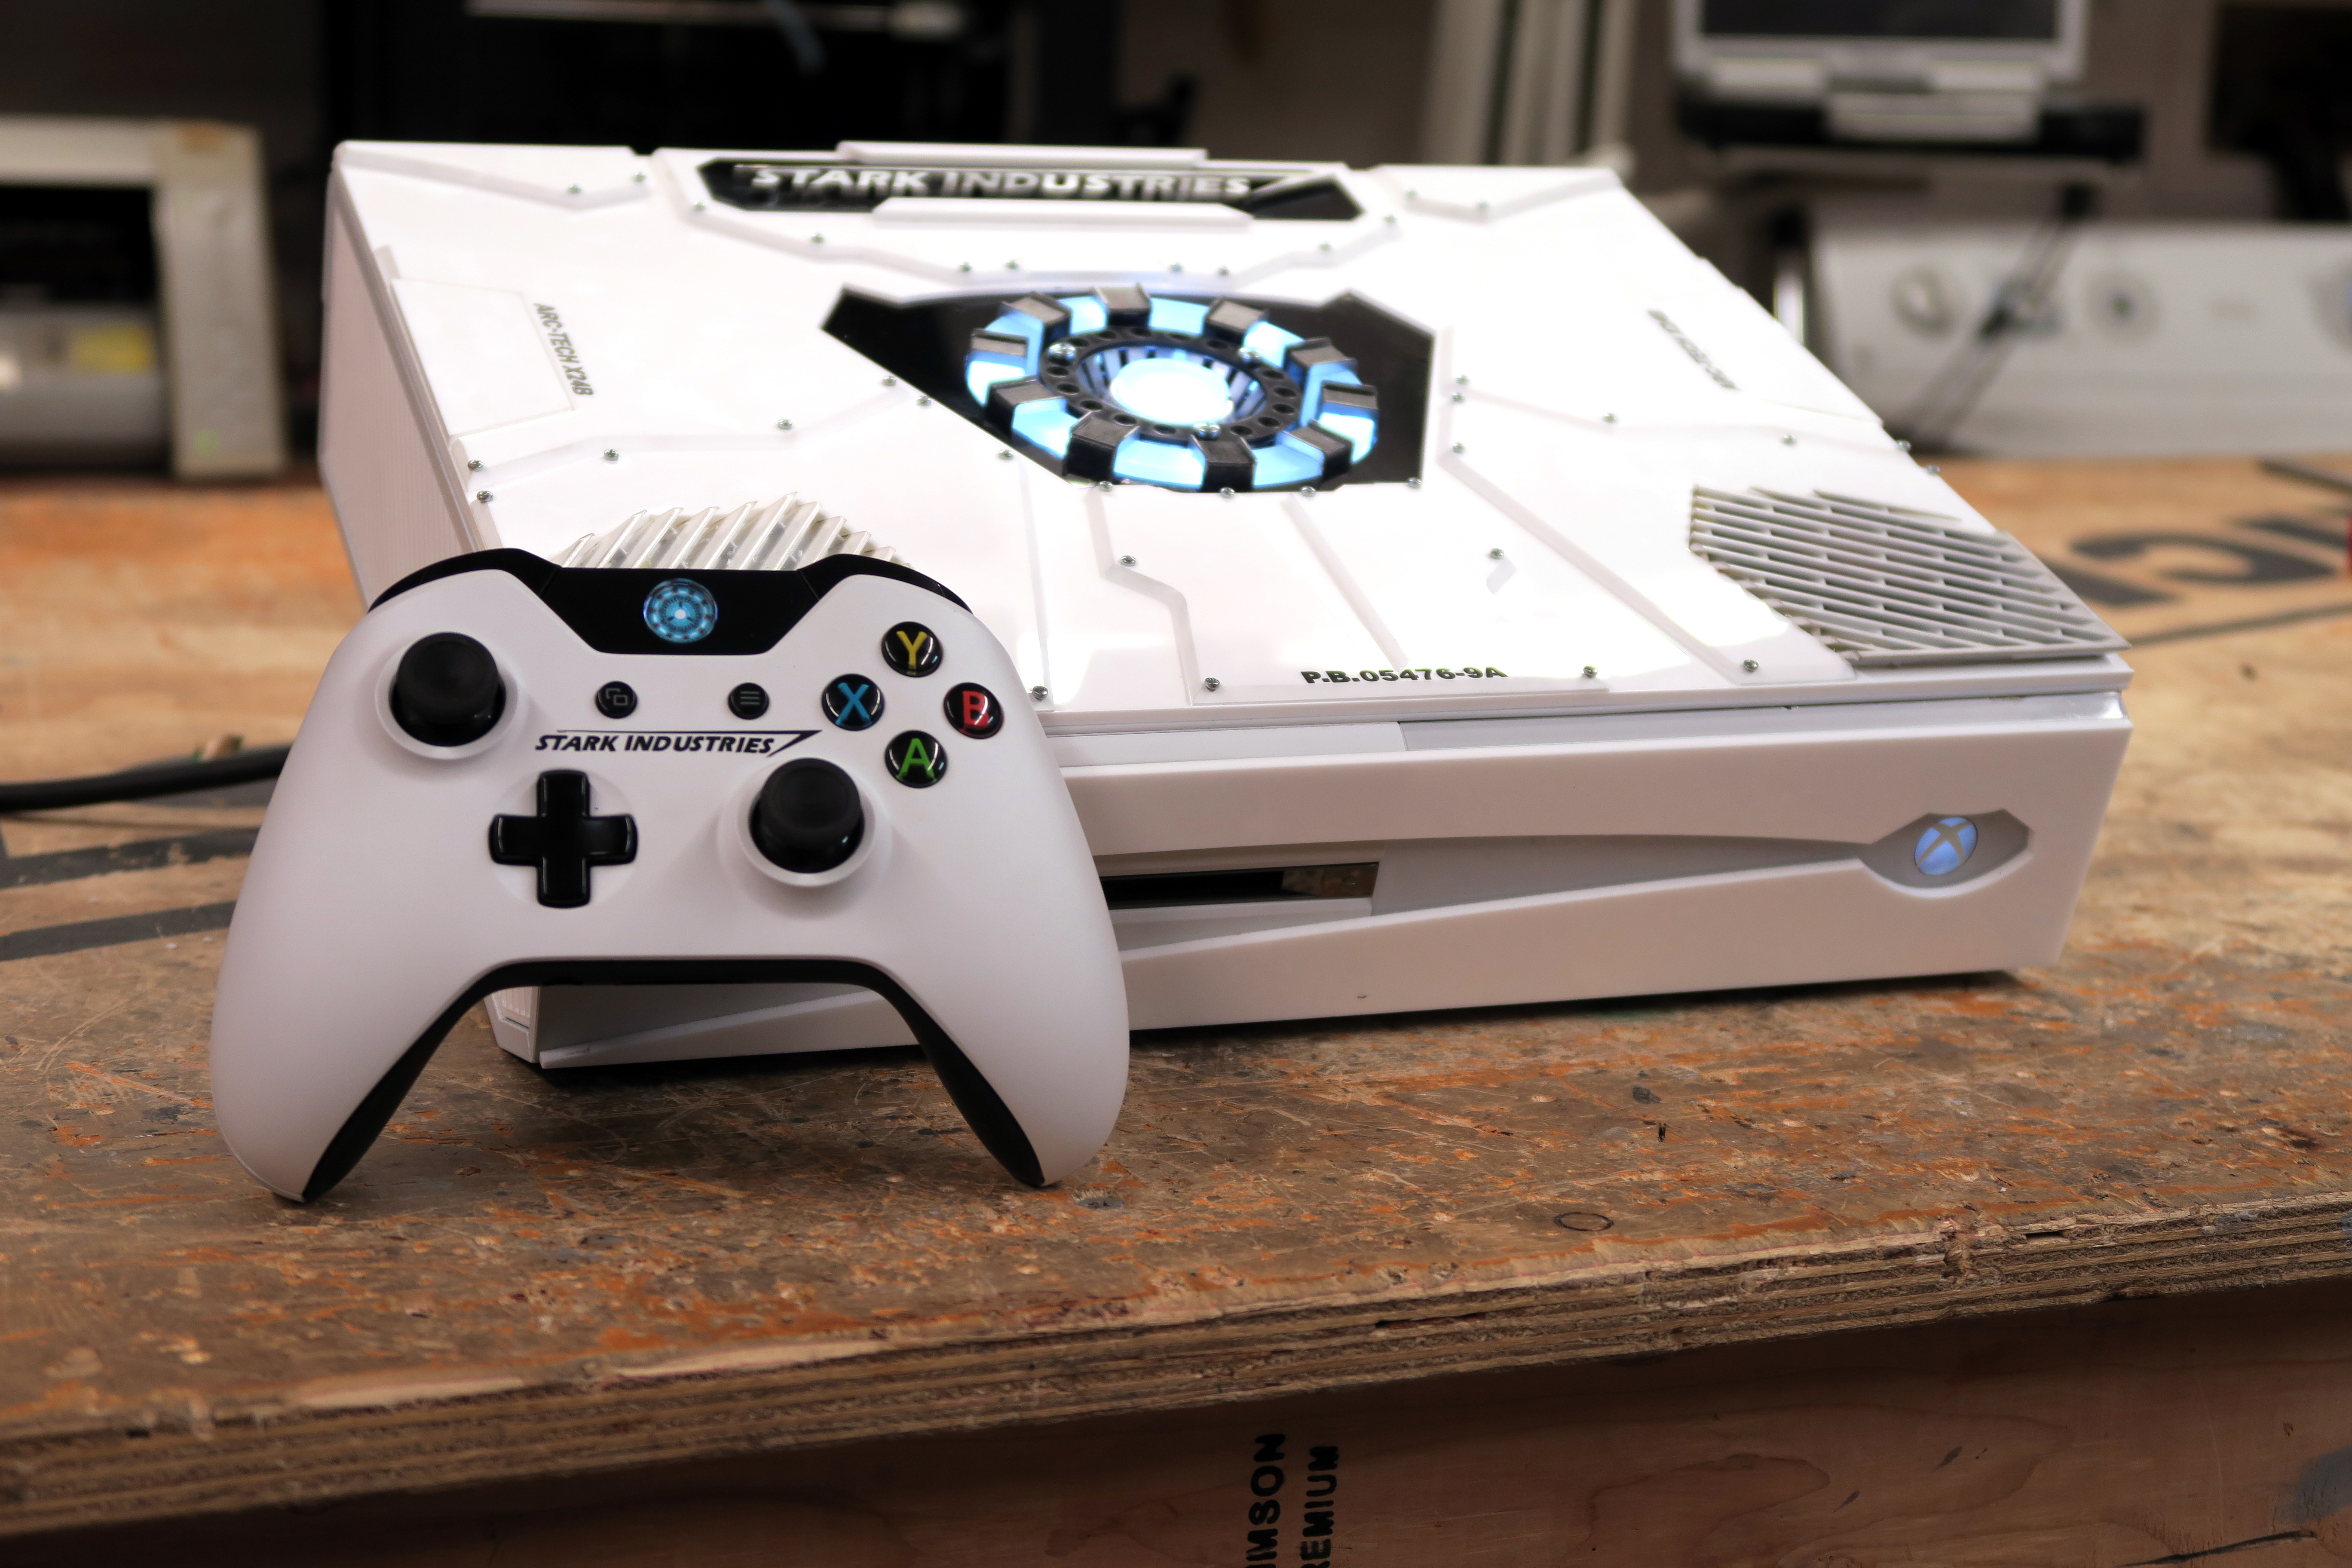
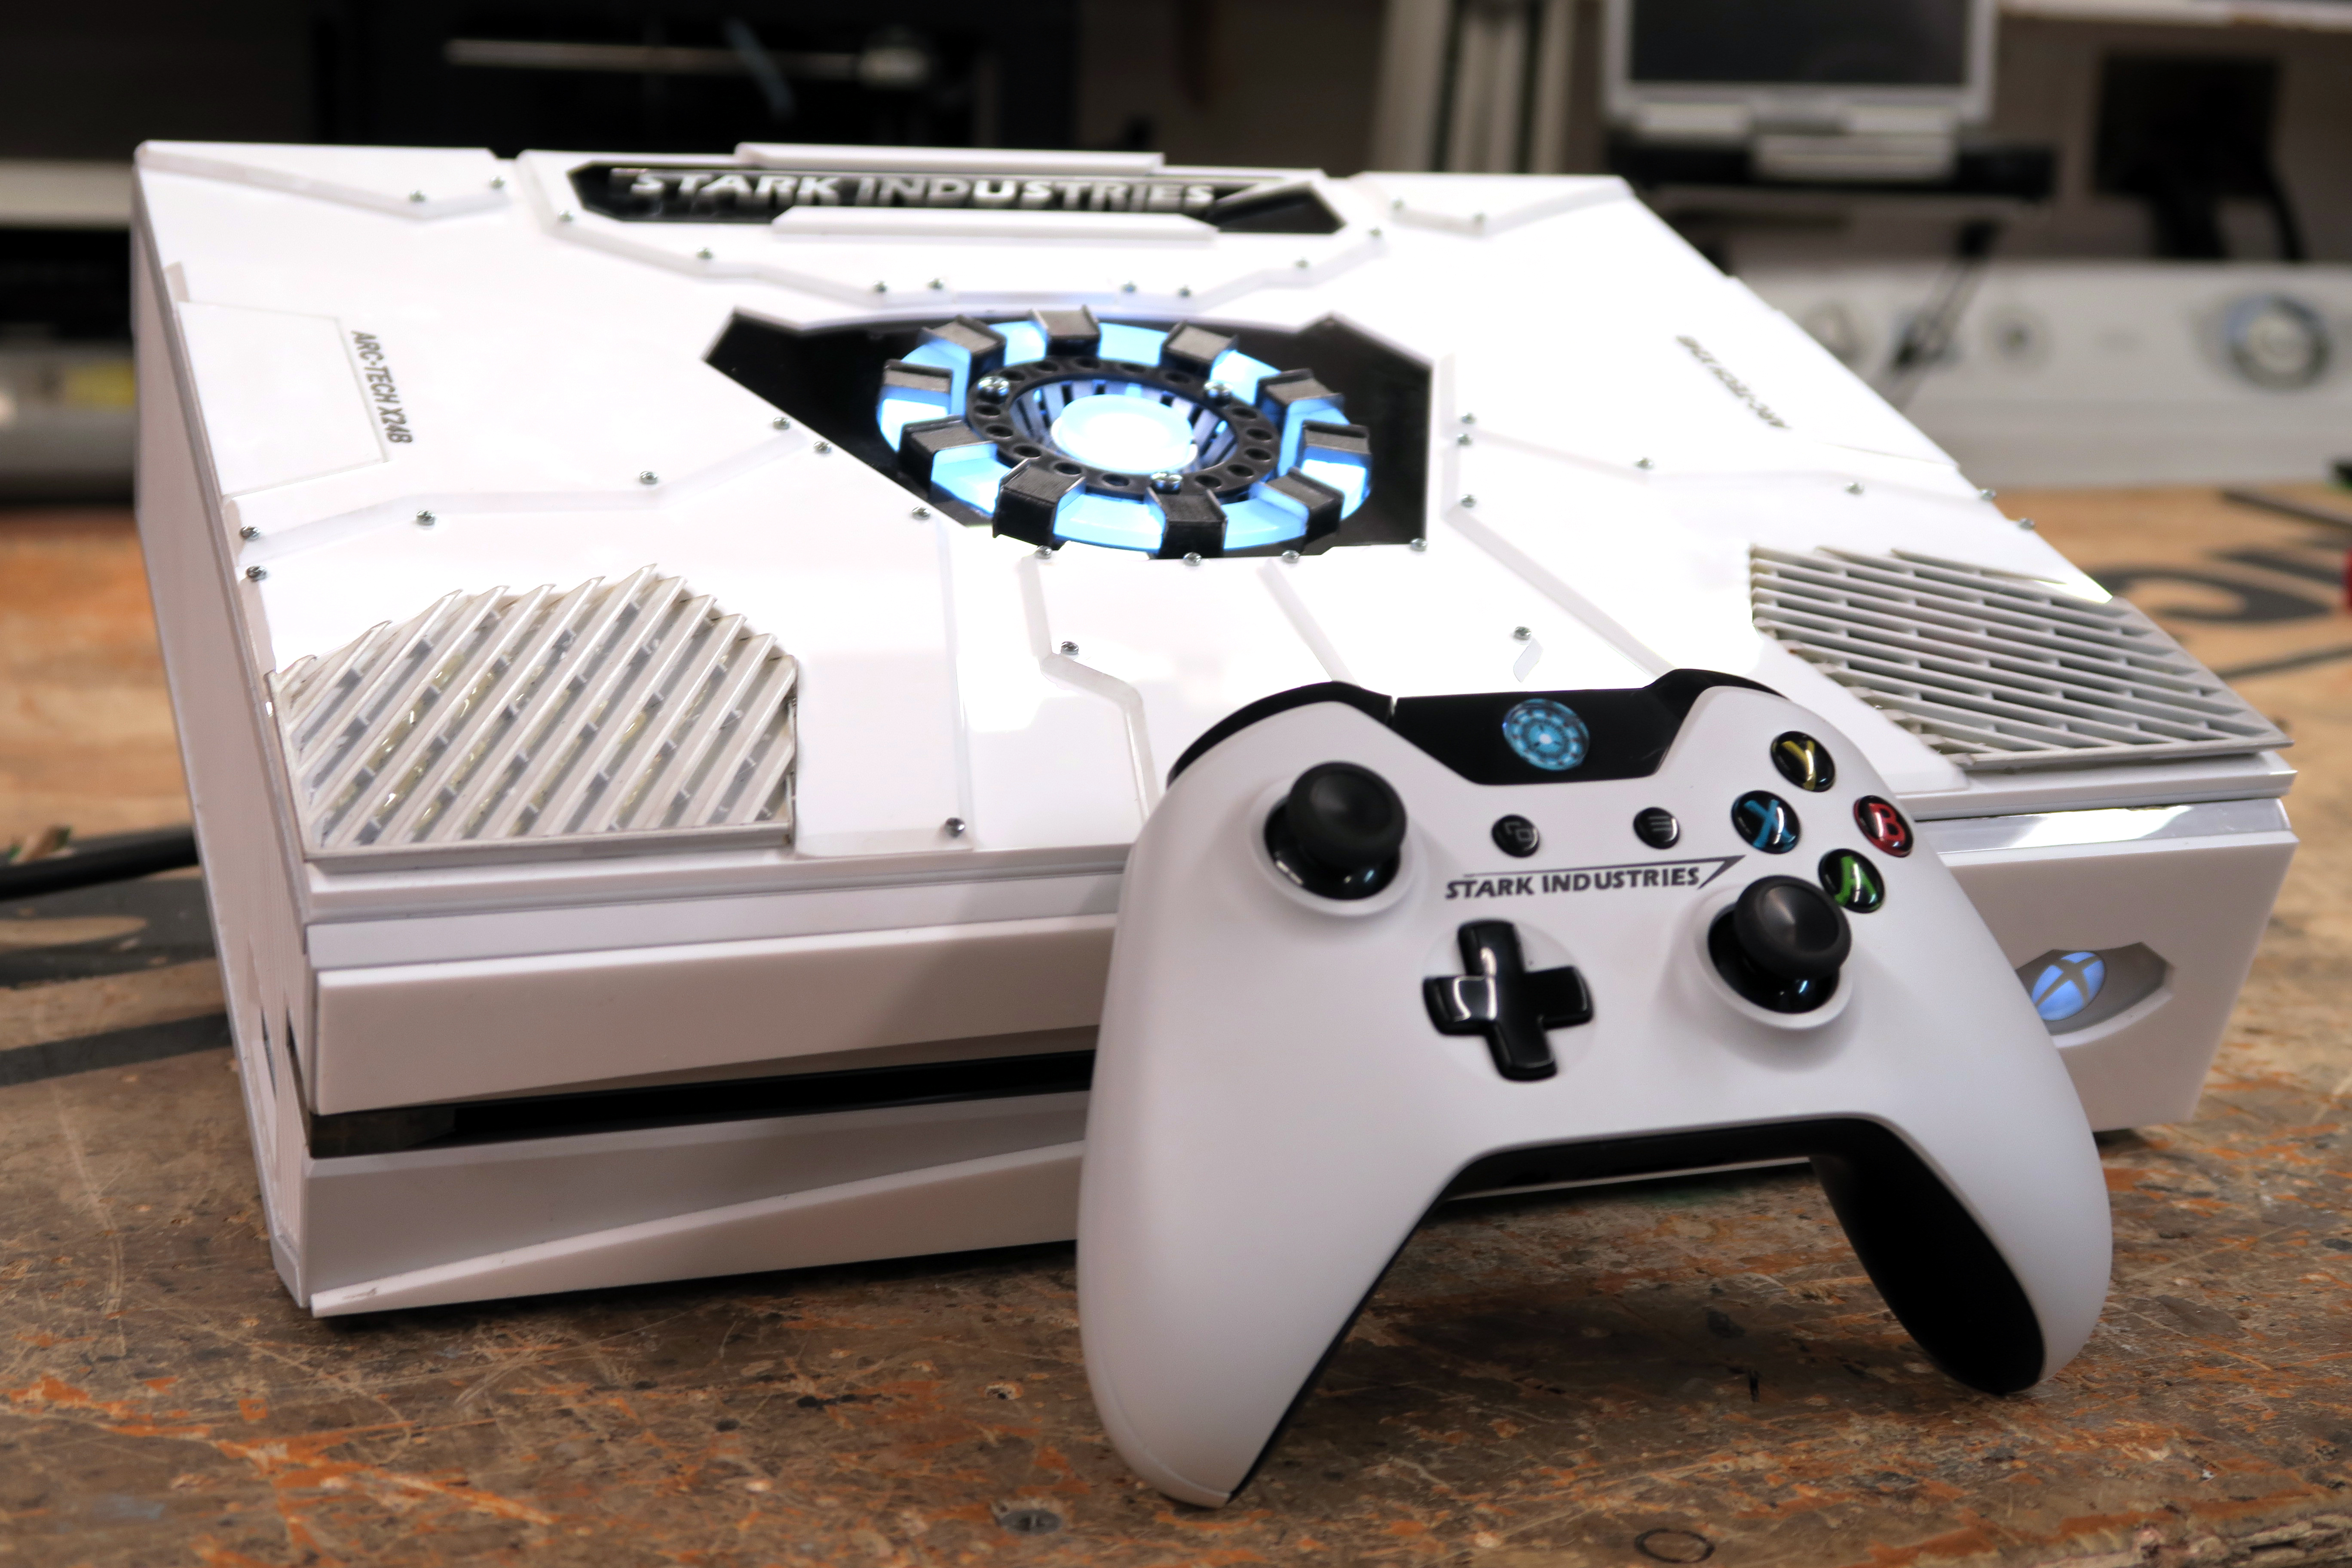
Once it was all put back together, it looked IMO, almost exactly what I would suspect the originals to look like. It had a nice white mirror finish with the Light up reactor and metallic Stark logo on the top. It was almost perfect… Only needed now to figure out the controller!
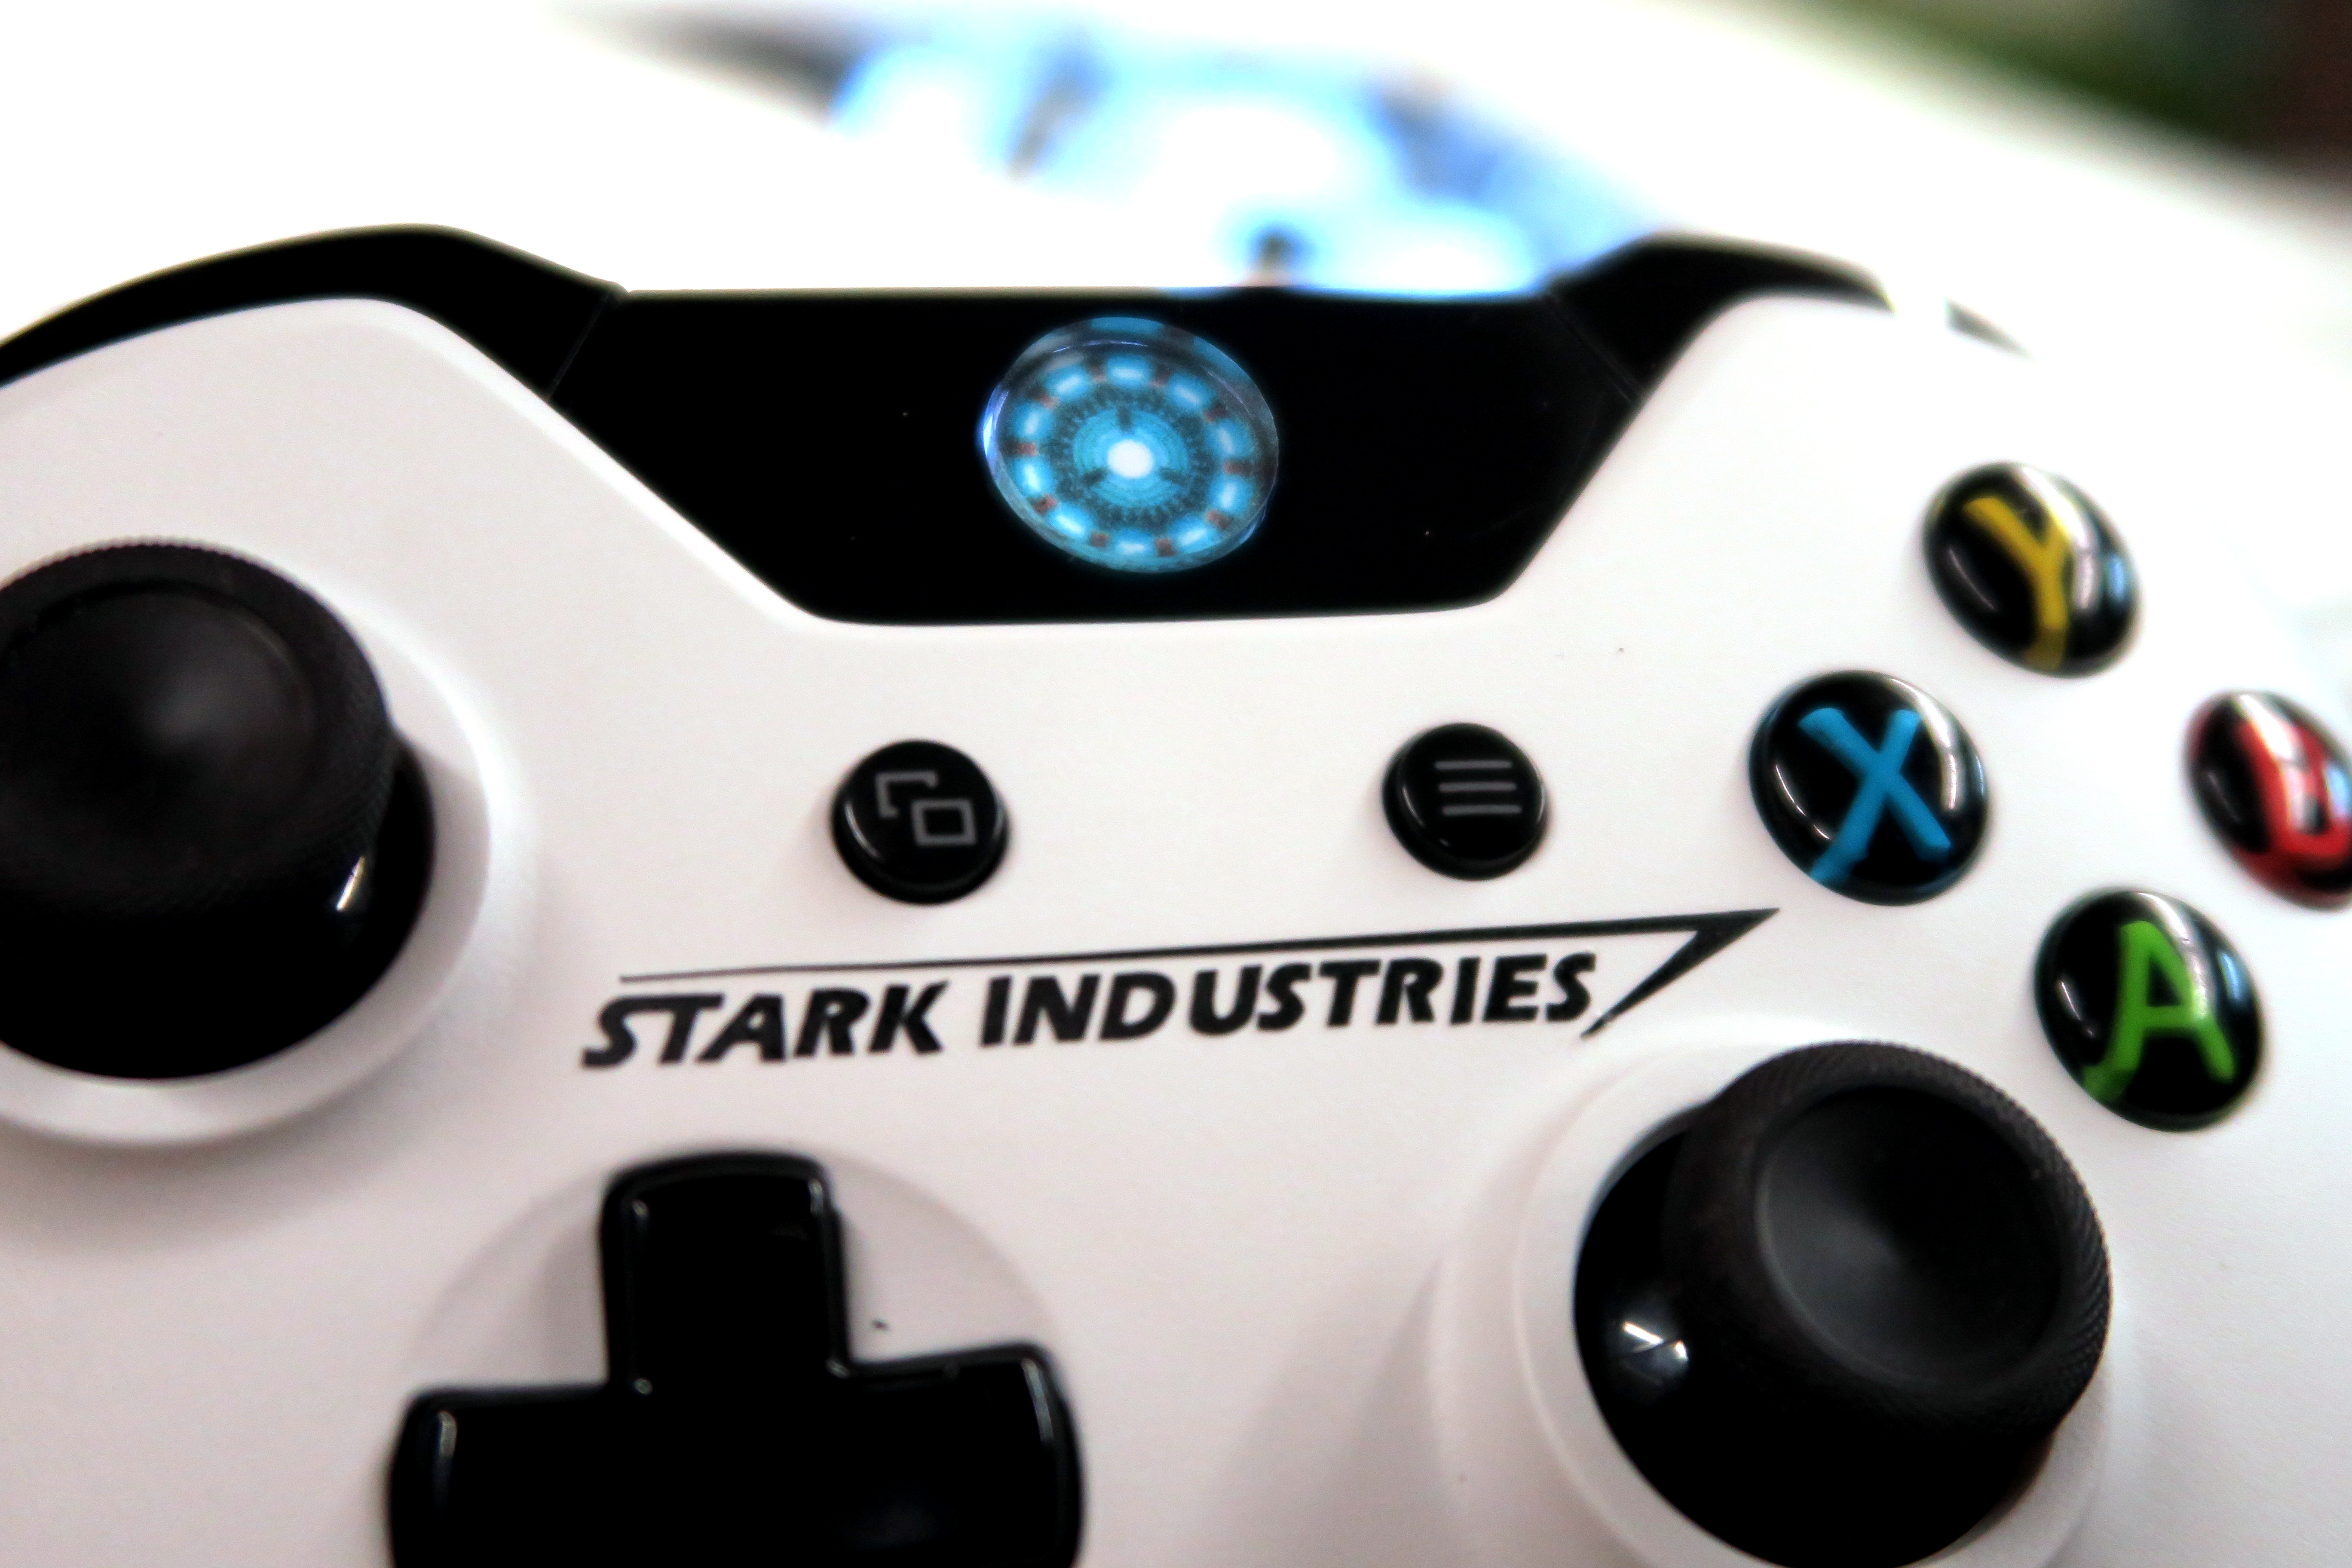
The controller wasn’t to bad. The Stark logo on it was a simple vinyl decal. Now it was pretty small and I had a hard time getting my machine to cut such a small logo, but it work. The interesting part was the small arc reactor that replaced the Microsoft XBOX “X” power button on it. After removing the internal plastic button, I ground it down and basically sandwiched a small print of a reactor in between it and a small acrylic circle. It was a success!
All in all I am pretty happy with this console mod. It was nice doing something different than my standard laptop mod. It all came together nicely and I think it looks pretty dead on.
FULL BUILD LOG HERE