Rss

  • twitter
  • youtube

Archives for : Gaming Console Mods

XBOOK DUO

xbookduologo
The XBOX 360/ONE Combination Laptop! Yes you heard right, there is both a xbox 360 AND a xbox one inside of this XBOOK… THE XBOOK DUO! This solves the life long problem of the XBOX ONE not being backwards compatible! Play XBOX ONE games, and when you feeling nostalgic, or cant play with your friends that still have a 360, with just a simple flip of the switch you now have a xbox 360 laptop! This is the first ever XBOX Laptop combo unit with 2 systems installed. Check out the video below. I also filmed almost every step of me building this unit for your enjoyment! So check out the HOW TO video as well!


Now please note this system is not available for sale, it was simply a proof of concept/prototype design I wanted to make. But it is real, and works perfectly! Both the XBOX 360 and XBOX ONE fit in the same width/length of the XBOOK and PLAYBOOKs I make, its only a little bit higher.


20141028_002503


Now the inside of this unit is even more impressive that it all fit. The 360 fits snuggly on the left side of the unit with the disk drive exiting from the left side. The One is up towards the top right and, you guessed it, ejects on the right side of the unit. The whole thing only requires one cord. The xbox power supply is also installed internally and is able to power both XBOXs, but only one at a time, which is all you would use anyway. There is a main switch that you can choose whether you are using the XBOX 360 or the XBOX ONE. The HDMI outputs from the two xboxs run into a smart HDMI switcher that automatically switches to the active input. The HDMI then comes out of the switcher into a splitter that allows you to use the built in 22″ Vizio 1080p LED LCD monitor, or to the HDMI output on the back of the unit to play on the big TV at home. You can also see the two LCD driver boards inside of the unit as well. All of the cooling works well and so far I haven’t had any over heating issues. Its a tight fit inside, but really looks sweet!


20141027_184614

20141028_002542

20141028_002517

Both of the stock xbox capacitive buttons are accessible from the top of the unit along with the eject buttons and both controller sync buttons. There was a lot of extra wiring I had to do for this unit to make it all fit in the appropriate spots. You even have the LCD power and volume buttons right bellow the “system switch”. You still need to use two different controllers, since they are different, but still is cool! This really is a great unit to have right now during this “transition period” for old and next gen consoles.

20141026_225302

20141027_012614


I also added some custom graphics to show off the “XBOOK DUO” I also made a backlit “XBD” logo on the front of the unit that illuminates when I turn on either console. Also with some custom Green and Black accents, it really came out looking sweet!

20141028_002735

20141028_001943

20141028_001908


If you guys want to see an in depth look at how I build these units (The basics I show you are the same basics I use to build all of my XBOOKs and PLAYBOOKs) Check out the video below. Also please check out my XBOOK ONE and PLAYBOOK 4 Both of these have videos and show off my mods!


Again guys, this unit was not built to be produced to sell, this is a one of a kind prototype.


Hope you enjoyed!

Ed

xbulogo

PLAYBOOK 4

*PLEASE NOTE*

I am in no way affiliated with Sony or PlayStation. The PLAYBOOK is simply a console modification for a Sony PS4. This is not a licensed Sony Product and should not be confused as such. It is a custom made item by EdsJunk.

Well everyone, due to popular demand, here it is… The PLAYBOOK 4! I had alot of requests if I had plans to make one, and it seemed to happen quicker than later! I had some time in between XBOOK orders to get this one made! It came out awesome and really does look sharp! Check out the video and photos below!


1

2


  This system is built on the same foundation on my XBOOK ONE (xbox one laptop), Its all been designed in 3D and then manufactured by me using 3D printers, Laser Cutters and CNC Machinery to give a great looking design. Its simple, yet detailed. The system just screams play me! Luckily for me, the Destiny version of a PS4 is white and black, So that makes the PS4 controller match the new white system I designed. So I am calling this one the Destiny Edition! But if you want your own, you can choose almost any color you’d like for the corners, logos and the main body can be either black or white.


20141014_170746


  The whole thing has been designed to go together almost seamlessly. All of the 3D prints and laser cut acrylic fit nicely into each other and all match up. It is all pieced together using glue, screws and chemical cements to form the main body, just like the XBOOKs, These are sturdy and very strong. Now I still must say these are not “toys” and should be treated with care, but they wont fall apart on you thats for sure! I have been designing systems for awhile now and have solved any problems I have had in the past.


20141014_223209_Richtone(HDR) 20141014_170733\ 20141014_170740


Just like the XBOOKs, these PLAYBOOKs use 22″ Vizio 1080p LED LCD Televisions. These are very crisp clean screens and really make your games look great. But if you want to play on a bigger screen, a HDMI out port can be included so you can play on your tv at home! Also included on the back of the unit is your power plug, Optical Audio out and Ethernet out. The WiFi also still works, so you can play wireless! That being said, this unit does NOT have a battery, it must be plugged into a 110v wall outlet to work. These game consoles are just not designed to run on batteries, sorry guys! Now I could go on and on about all of the details, but I recommend checking out my XBOOK ONE page, and I show a lot more info. This system is built very similar to the XBOOK, so that will explain more. I have to admit the white version looks great, but so does the black one. Honestly, out of all the ones I have built, I have not seen a bad color combo! But this Destiny version might be my favorite!


20141014_222145_Richtone(HDR)


  I will be pricing these the same as the XBOOK ONEs. It will be $1395.00 for a PlayBook 4 without HDMI OUT. To get HDMI out, it is a extra $50.00 to cover the costs of hardware to do that. You can also send me your PS4 if you would like to save a little bit, I will just use yours as the main system inside the unit.

PlayBook 4 – $1,495.00 USD

PlayBook 4 (you provide your PS4) – $1,195.00

W/ HDMI OUT – +$50.00 USD
Flat Rate Shipping of $100.00 to 48 US States Please contact me first if your international or at a APO or similar.


  Heres how the ordering will work. Click the Paypal button on the bottom of this site and you will pay $750.00 upfront nonrefundable deposit. This gets your name put on the list (trust me, its gets full quick) and gets me working on your PlayBook. After its completed, you will pay the remainder and shipping and your PlayBook will be shipped out! Once I start on your unit, it will take 2-3 weeks to complete. There may be people in front of you, so be aware of that. If you have any questions at all, please go to my contact page HERE and send me a message! I will be in contact with you through the building process and will make it personalized for you!   You are able to pick the color of the accents and corners, also the color of the acrylic, either black or white.   Color choices for the corners are: Black, Red, Yellow, Blue, Green, Copper, Silver, Grey, Orange, White, Purple, Pink and more, just ask me if there is something specific you want.   I can do full graphic customization if you want as well, it does cost more to do full custom work, but let me know.   (These are just examples to see different color options, but you can choose other colors as well, just email me!)    8green 8red 8yellow  
 

Please note that there may be minor differences on the design of the unit, as in Screw Locations, Air Vents and buttons. These may only be minor changes that are actually improvements on the units design and function.

Also please note that these units run on 110v AC Power, if your an international customer and need to use 220v or 240v, please plan on using some sort of step down transformer as I do not give any guarantee on using the system on other power systems.


Inside this unit is a Sony PlayStation 4. The PS4 has not been altered in any way that would be illegal on the PlayStation Network. It has no performance modification or enhancements. The PLAYBOOK is simply just a plastic case that holds a PS4 inside with a LCD Screen. I am in no way affiliated with Sony or PlayStation.  It does not have a Sony warranty as you loose the warranty as soon as you take a PS4 apart. I will guarantee it will not be DOA. It is non returnable as these are custom made for each individual buyer.  

XBOOK ONE

xbookone

*PLEASE NOTE* I am in no way affiliated with Microsoft or Xbox. The XBOOK is simply a console modification for a Microsoft XBOX One. This is not a licensed Microsoft Product and should not be confused as such. It is a custom made item by EdsJunk.

THE XBOOK HAS BEEN REPLACED BY THE NEW XBOOK ONE S. Check it out HERE.


It was only a matter of time until I got around to making a XBOOK ONE! For those of you not familiar with my previous work on xbox laptops, I call them XBOOKs. I made quite a few of the XBOOK 360s over the last couple years, probably around 30 of them. But the xbox 360 is old news… out with the old, in with the new! So I now announce the XBOOK ONE! One of the first laptop mods for the Xbox One. Hope you like it as much as I do! 12 It all started about two months ago when I decided it was time to finally tear down a new xbox one… tear…. but I knew it would be worth the sacrifice of the xbox one to give birth to the XBOOK ONE! I wanted this new xbook to be cleaner, thinner, easier to build, and more over all more cool. The xbook 360 had a 19″ 720p screen, I wanted bigger and better! So I went with a 22″ LED LCD monitor. This things is incredible sharp, as it should be at 1080p resolution. I swear this thing looks better than on my big TV! On my old xbook, after playing long hours, my eyes would be tired of looking at a small screen, so I went with this bigger size, but all the while, I actually got the laptop another .25″ thinner. So the tear down began……. 10468641_10203518339654381_7904067305038140573_n   1 Since my last xbook build, I have acquired even more machines to help out with productivity. I have purchased two makerbot replicator 2s. (Check out my shop tour) These machines at first didn’t do much around my shop, but now that I have found there niche, they have been a huge asset around the shop. I am printing the corner pieces, brackets, custom component mounts and such that I just wasn’t able to do before. This has been HUGE in making the XBOOK ONE. It is giving me the opportunity to create things I just wasn’t able to before. Here are some parts. 2   What is also different with 3D printing and to what I was use to with the laser and cnc router, is I now need to design in full 3D. There was a learning curve to this. But now that I understand it, it has also been a huge step in making these xbooks. I can now design the whole thing digitally and see what will fit and what wont. This also helps out tremendously for measuring parts. I sat down with Autodesk Inventor and drew up all of the parts and starting creating the XBOOK ONE. And then I was able to send each machine the parts it needs to make and then amazingly enough, everything matched up perfectly my first go! Which was impressive to me to say the least.   17 16   Some other things I have done better on this version compared to my last xbook is the LCD LVDS Cable. The ones that come with most monitors, like the Vizio I’m using, the cable from the controller board to the lcd is about 4 inches long. This doesn’t play well when I’m trying to make a laptop. I need it much longer. I use to extend the cables myself, or have my good buddy Mike Burnette do it (There’s your shout out Mike). This involved cutting each of the 30 wires and extending them all individually and soldering all of them. This took a couple hours and the cable was much bigger than it needed it be. Well I found a solution! I discovered a company that will make custom LVDS cables for me at the length and specifications I need! Yes, this cost money, but money well spent I say! Its much thinner cable and no solder points! It gives it that much more professional look! I also changed the location of the speakers from the LCD bezel to the front of the unit. I did this because the screen is so big, anything I can cut off of it will be space well saved. The volume controls, along with the xbox controls, are all on the inside of the unit now instead of the out. No reason in particular except that I wanted to. 3 A custom fan shroud was 3D printed to help save space as well. The stock xbox one fan is really tall. I was able to get more CFM with these fans then the one big fan. So far I have had not a single heating issue and it seems to be cooling efficiently. You can also see in that picture above about where all of the components went, there are some slight differences in the production run of these XBOOKs, but you get the general idea! Also, using all laser cut acrylic gave me the ability to keep the lines clean. I was able to cut through the walls of the case exactly where they needed to be, like the bluray drive opening for example. Also I was able to laser cut all of the screw holes for the components and hinges so everything lines up perfectly when assembled. This again was a improvement over the old design. As for the motherboard of the xbox, it was not changed in anyway to make it illegal to play on xbox live. No performance mods were done and is basically a stock xbox inside. I did not move any of the ports either, but they are all still accessible in the back of the unit. So you can still plug in your Kinect, audio out, HDMI in, USB ports and such. By leaving the ports in the stock location, it keeps the integrity of the xbox whole. That way I don’t have to worry about a faulty solder connection breaking over time. This just keeps the unit reliable. An optional HDMI output can also be added. Just pay for the extra components needed to include this. This unit can be fully customizable to your liking. The blue accents and corners you see on this unit can be any number of colors you want, there is a list on the bottom to choose. I can also change the color of the vinyl graphics and add your gamertag if you’d like. Everything is up to you!   4 9 6 14


THE XBOOK HAS BEEN REPLACED BY THE NEW XBOOK ONE S. Check it out HERE.


I can do full graphic customization if you want as well, it does cost more to do full custom work, but let me know.

Please note that there may be minor differences on the design of the unit, as in Screw Locations, Air Vents and buttons. These may only be minor changes that are actually improvements on the units design and function.

Also please note that these units run on 110v AC Power, if your an international customer and need to use 220v or 240v, please plan on using some sort of step down transformer as I do not give any guarantee on using the system on other power systems.


8green 8red 8yellow


Here is some examples of custom designs that can be done to your XBOOK. It costs a bit more due to the time it takes to make a one of a kind product, but really does set your XBOOK apart from the rest! This one is the Call of Duty : Advanced Warefare Edition!


2014-11-04 02.46.10


2014-11-04 11.13.19


2014-11-04 02.38.05


Inside this unit is a Microsoft XBOX ONE. The xbox has not been altered in any way that would be illegal on xbox live. It has no performance modification or enhancements. The XBOOK is simply just a plastic case that holds a XBOX inside with a LCD Screen. I am in no way affiliated with Microsoft or Xbox.  It does not have a xbox warranty as you loose the warranty as soon as you take a xbox apart. I will guarantee it will not be DOA. It is non returnable as these are custom made for each individual buyer.

XBOOK 360 Laptop

The XBOOK ONE – The Xbox One Laptop is HERE!

THE NEW AND IMPROVED XBOX LAPTOP! I call it the XBOOK!

xbook logo

The XBOOK ONE – The Xbox One Laptop is HERE!

The last XBOX Laptop I made was a great little machine. It sold well on here and I brought it to so many LAN parties and got tons of compliments on it. I not only sold them to people that just wanted a xbox laptop to brag about, but also went to soldiers that used them all over the world. But at $1700 it was a bit out of reach for alot of people.

    I wasn’t trying to charge alot to make alot. Alot of people would email me and offering me as little as 200.00 for one! I had to turn down alot of people because of how long it took me to build. Took me about 3 weeks of time from the CNC Machining to all of the soldering I would do. So I set out to make a new Xbox laptop that was not only better quality, thinner and better screen… but one that I could sell for much cheaper and could build quicker. So the idea of the XBOOK was born!

    Since my last xbox, I have acquired more machines to help me build this XBOOK. I got a bigger CNC Router as seen on my blog. This allowed me to make more parts at once and make it faster. I also purchased a Laser engraver/cutter. This has been extraordinary to use to cut acrylics. I also picked up a vinyl plotter that has been a life saver when it comes to the detail work and graphics on the XBOOK.

xbookcad

    I took alot of time designing this xbox in cad drawings. It is made up of a total of 4 layers of black starboard plastic. Starboard is a marine grade polymer that hold up real well! Its VERY strong and comes in black so no paint that can chip off! Saves time and materials! Its of the same type of material that cutting boards are made out of. This stuff holds up WAY better than the older PVC material I used on the previous laptop. I then used Black acrylic for all of the outside covers and also the inside of the laptop. This allows for a nice glossy shine, but also gives something for the vinyl  to stick too as its hard to apply anything to starboard with adhesive.

IMG_2120 IMG_2127

All of the silver detail work on this is vinyl. This is all cut on my plotter and fits PERFECTLY on this XBOOK. It gives it a real professional look that is superior to the older laptop. All of this is customizable. You can pick pretty much any color for the graphics and also on the screen in between the speakers I can put your gamer tag in! (Or any other word you’d like).  I can not change the color of the black starboard. That is the only color it comes in (other than white) and you really cant paint it. But, that being said, all of the acrylic you can change the color of. That would be the Button panel, CD Tray, Ring of Light, side covers and the LCD bezel and inside of the XBOOK. I would have to special order the colors if you wanted something other than black for the acrylic, and would take a little longer to make and cost just a little more for materials. But I do have in stock like 30-40 colors of vinyl and will do any color you’d like! Just email me if you have any questions about that.

Now onto the screen! The old xbox laptop I made had a very nice 17” 720p HD monitor. This looked real good and made for a great display. But.. I wanted something better for this new one. I have upgraded this laptop to a 19” 720p HD LED Screen. This is very crisp and VERY bright. The LED Backlight is current technology and has a very even glow to it! It also makes the screen much thinner as well! The old 17” screen was nice but still felt a bit small. This 19” is perfect! You dont feel like you gotta sit real close to play!

Right below the screen is a pair of high powered speakers. It gets much louder than the previous version and also is positioned better. On the last one the speakers were on the bottom portion of the laptop and pointed up. On this, I placed them inside the screen bezel. This positions the speakers to point towards you. Gives a great stereo sound to them and even has good low end as well. This comes stock with a headphone jack as well so you can play in privacy if you’d like!

IMG_2134

As you can see there are PLENTY of vent holes. I used the stock cooling of the XBOX 360 Slim, so its quite and cools just perfectly. I have no had one overheating issue yet with this one or any previous model. Just dont leave it on if you close the lid! On the side you still have access to the slims internal hard drive. Just unscrew a couple screws and slide it into place and your good to go! (Also if you want, I left enough room inside the laptop to plug in a portable HDD into one of the stock USB ports… this can open up alot of possibilities for more HDD space!) The ring of light along with the CD Tray and Buttons are located on the front along with 2 USD ports. These buttons are the best I’ve ever made. They are extremely professional and look good! Starting left to right, you have Power, CD Open, Sync, and Volume up and down. (If you’d like to access the configuration menu of the LCD, there are more buttons inside the unit to change any settings you’d like of the LCD itself)

IMG_2124

Onto the other side you have another vent and your ethernet port. This XBOOK comes with built in Wi-Fi so you can play xbox live without the worry of a cable. But hey, its there if you need it! If you’d like component video out, the second vent here is modular so I can add video out no problem. Currently the screen uses HDMI as the internal connection, but if you’d like video out, id have to switch the internal video to component. You will still get 720p High Def, but the internal screen wont be as great as HDMI. Thats all your choice!

On the back of the unit is a simple universal power supply cable. The XBOX’s main power brick is located inside of the XBOOK. So no longer do you need to carry around a power brick either! And the LCDs power is pulled off that same cable on the inside. So it only takes a single cable to get this thing running! Please note that this does NOT have a internal battery. xboxs are not made to run off batteries. They are very power hungry and would eat through batteries extremely quickly, plus is weigh alot more!

xbox20laptop

Total weight of this unit is 17.5 Lbs. Thats not really heavy considering what your carrying! A xbox, Power supply, LCD screen, cables and a case all in one! The dimensions closed are 18.25”x12.25”x 3.5”. This is bigger, but much thinner than the last one. Only reason its bigger is because of the the 19” LCD screen. But because of this same screen I was able to make it a 1” thinner! This really is a great machine that will be the envy of all your friends!

Now down to the real question… price…. Like I said, I wanted to make the most affordable XBOX laptop on the internet with my previous model, and I did. But with this one, I wanted it even cheaper! And I accomplished this goal as well! This XBOOK laptop starts at $995.00 USD. Thats right, UNDER $1,000.00!!! Thats for a brand spanking new XBOOK laptop with customizable options for you! You pick the vinyl color and free gamer tag personalization! If youd like it even cheaper, send me your XBOX 360 (must be the new style XBOX Slim) and ill knock off $200.00 dollars off the price!

So here is the Price info……..

4GB XBOOK 360 Laptop      $995.00

250GB XBOOK 360 Laptop  $1,095.00 (extra cost of the xbox slim)

Gamertag Personalization     FREE

Customized Vinyl Color        FREE

Customized Acrylic Color    $50.00

Optional Component Out     $50.00

Supply your own XBOX      -$200.00

Shipping is $50.00 in the continental US. Contact me if your outside of the US.

Heres how the ordering will work. Click the Paypal button on the bottom of this site and you will pay $500.00 upfront nonrefundable deposit. This gets your name put on the list (trust me, its gets full quick) and gets me working on your XBOOK. After its completed, you will pay the remainder and shipping and your XBOOK will be shipped out! Once I start on your unit, it will take 2-3 weeks to complete. There may be people in front of you, so be aware of that. If you have any questions at all, please go to my contact page HERE and send me a message! I will be in contact with you through the building process and will make it personalized for you!

Inside this unit is a Microsoft XBOX 360 Slim. The xbox has not been altered in any way that would be illegal on xbox live. It has no performance modification or enhancements. The XBOOK is simply just a plastic case that holds a XBOX inside with a LCD Screen. I am in no way affiliated with Microsoft or Xbox.  It does not have a xbox warranty as you loose the warranty as soon as you take a xbox apart. I will guarantee it will not be DOA and will give you a 30 day warrantee on the XBOOK to fix any problems it may have that is not from user abuse. It is non returnable as these are custom made for each individual buyer.

XBOX 360 Laptop


Many of these have been floating around the Internet the last couple of years, and usually they seem to have an astronomical price tag attached. It never looked that difficult to make, and I have always wanted to give it a go. So after I finally got around to obtaining a CNC Router (small one, but great for learning!) I came up with this!

I have never done ANY cad design/drafting or any CNCing at all in my life. But have always been interested, so what better way to start then buying your own and start cutting stuff! I started with some small logos on particleboard, then thought I should have a good project that has a good goal at the end, and this is where the XBOX laptop was born, at least for me.

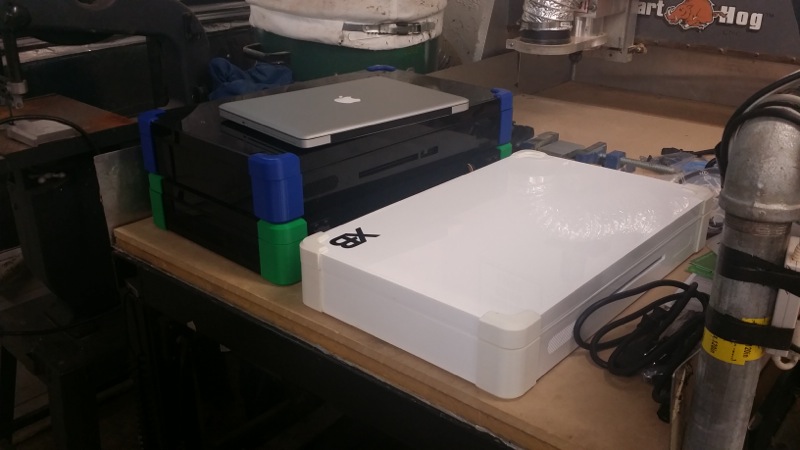
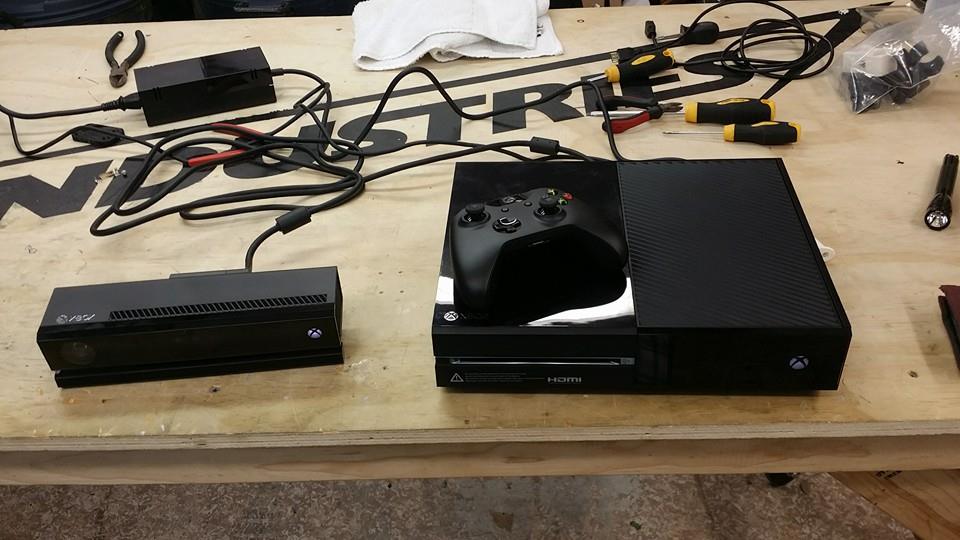
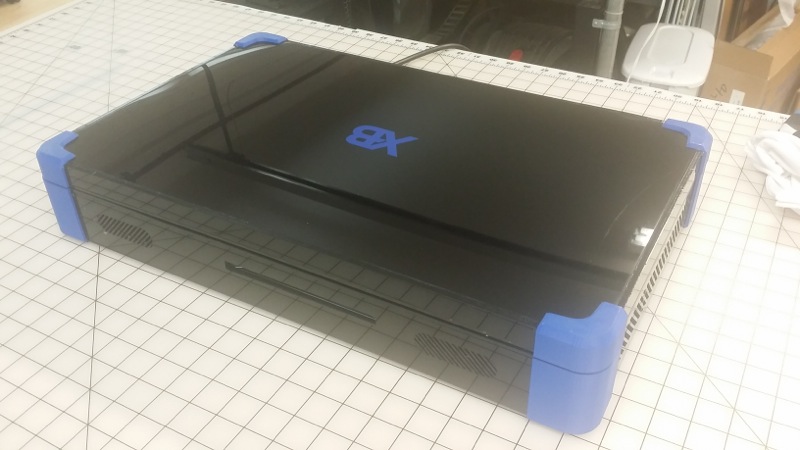
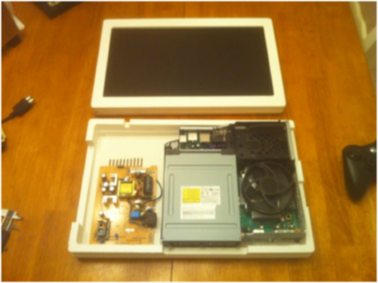
I started originally looking after other peoples design features and the way they organized the inside of the laptop. I spent about an hour arranging the boards on a make shift case trying to find the best way I thought to have them laid out. I ended on the XBOX pretty much being in its stock layout, along with the LCD being in its stock layout.

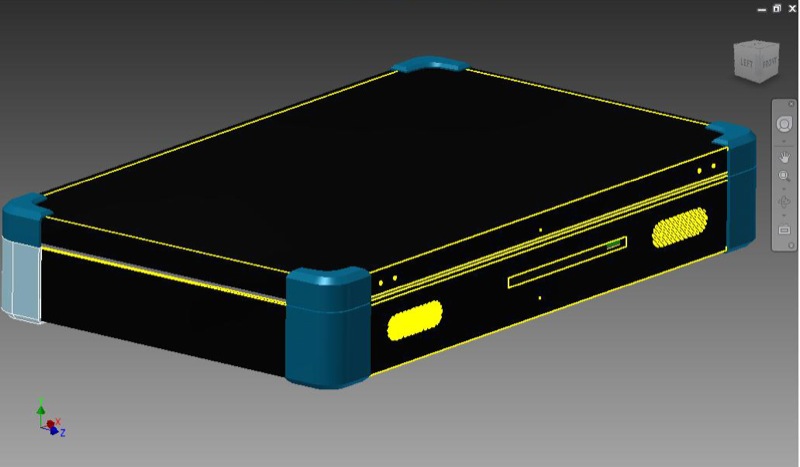
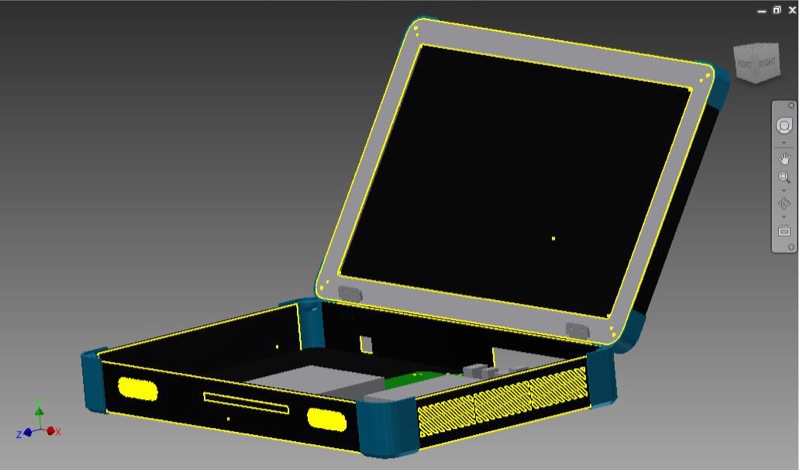
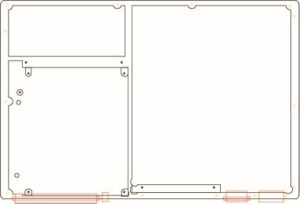
After getting a feel for where things were going to sit, I measured everything and went on to try to conquer the design. The only piece of software I had that could produce dxf was adobe illustrator, so I gave it a shot. Here is the top of the inside of the laptop.

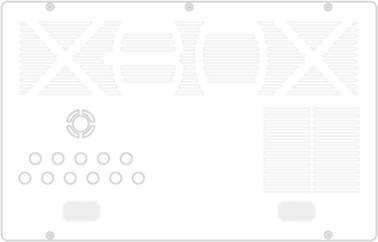
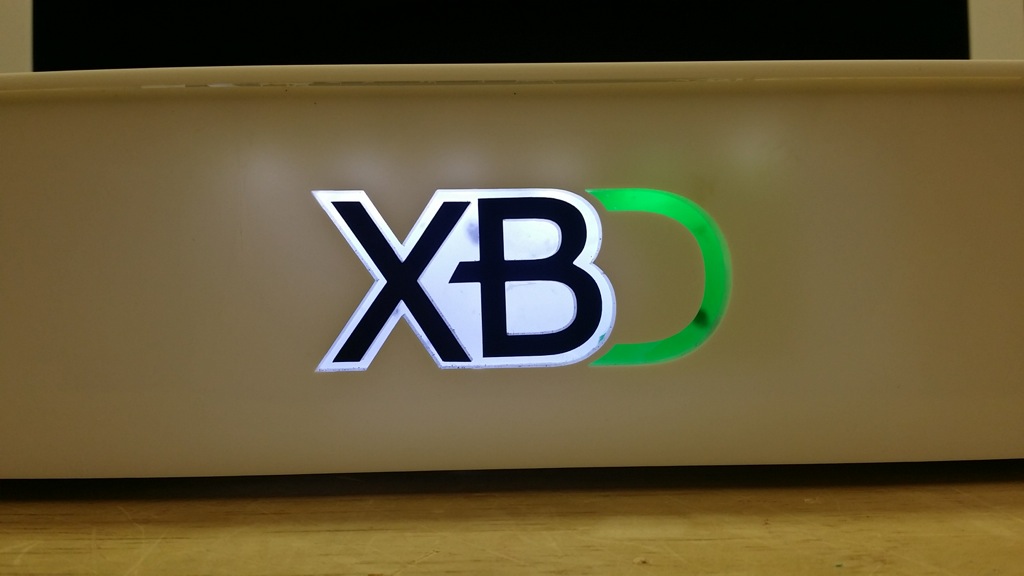
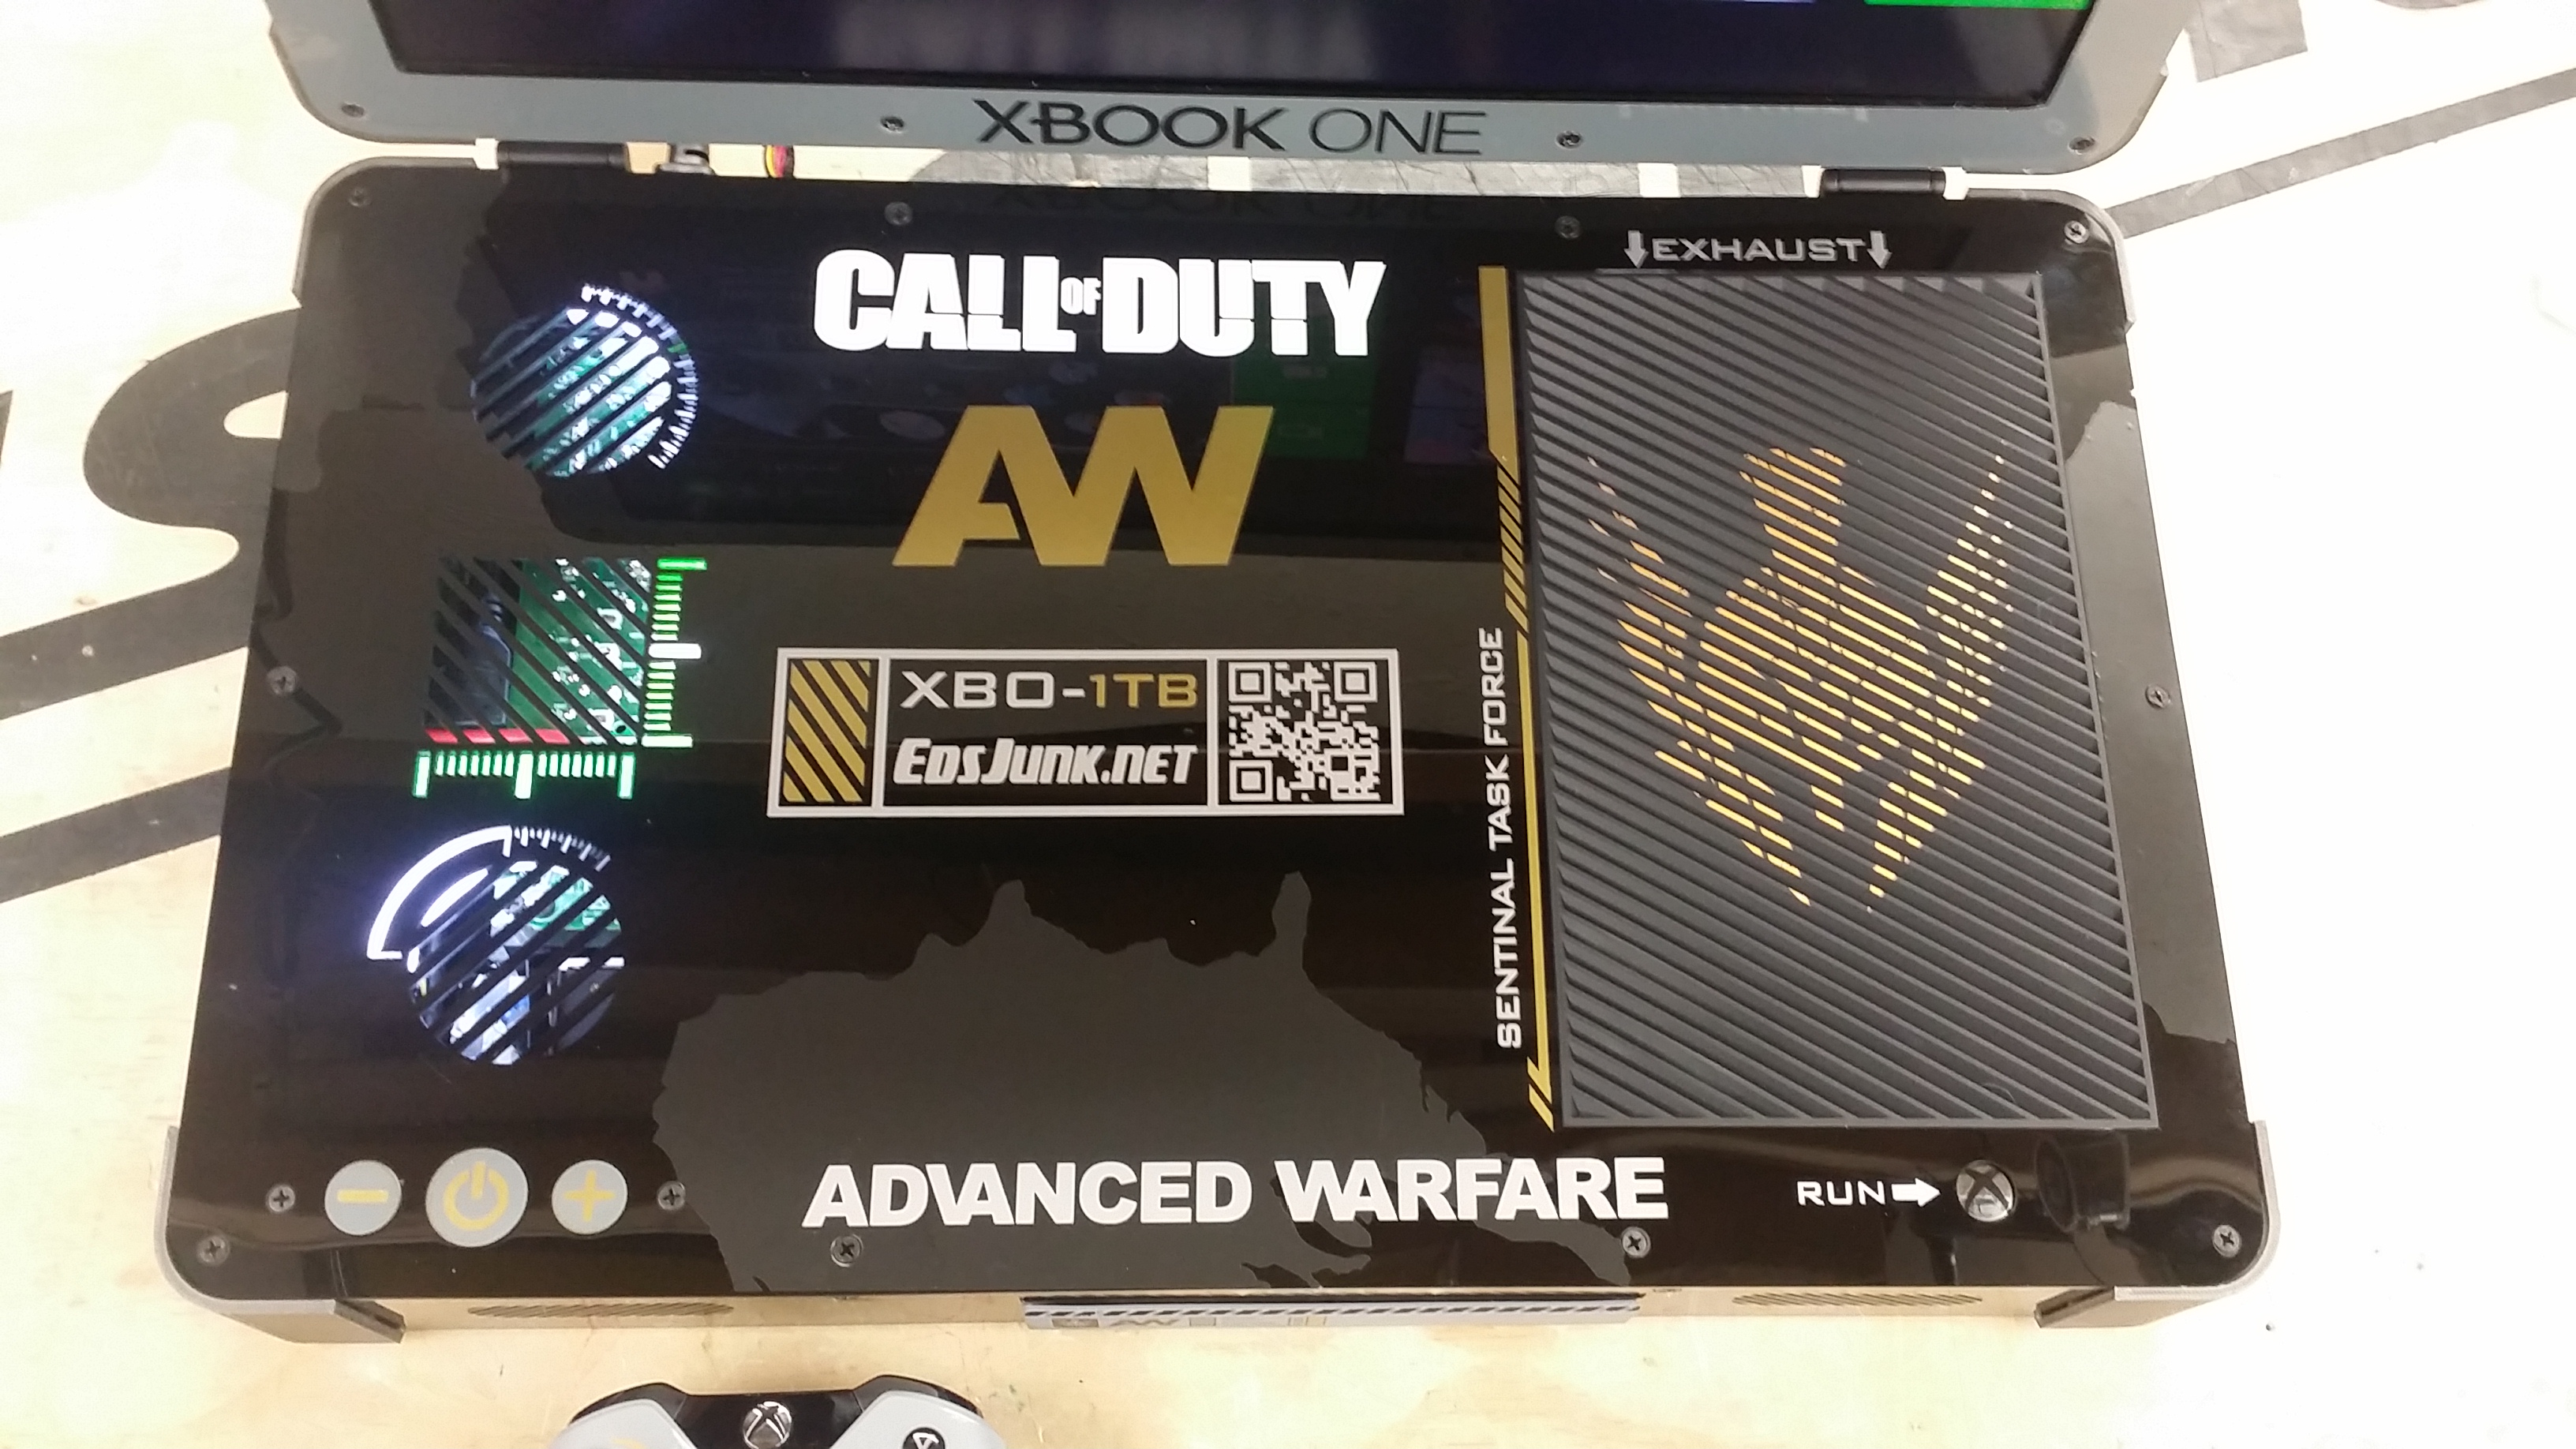
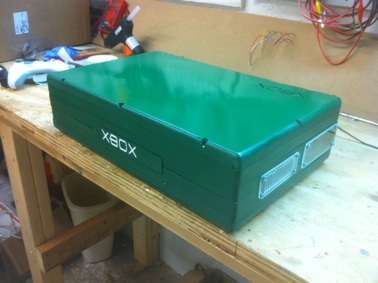
I knew I needed excessive vent holes, but I wanted them to look sharp and classy. So that is what I came up with. I liked the look! (and If you want one, we can work something out to put any word in there!).

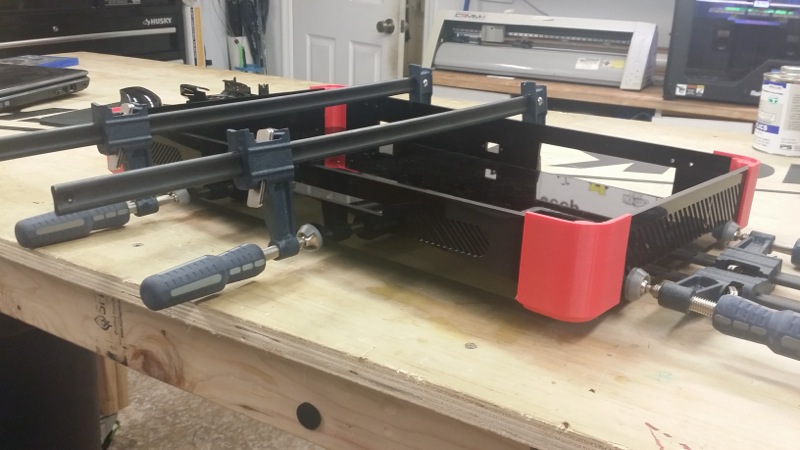
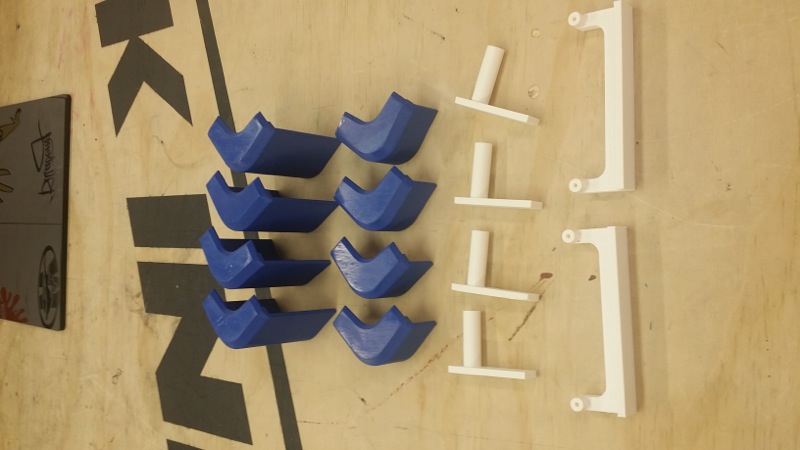
So off to the world of routing all of this! I can’t say how many plastic particles ended up in my garage, but it was crazy, took a whole day vacuuming after I was done! I learned a lot from doing this first laptop, from what not to do, to some tricks to make it better. I was proud of the first one, yet it showed me areas of improvement for my future one (as this one is already sold to a friend, I miss it already). 

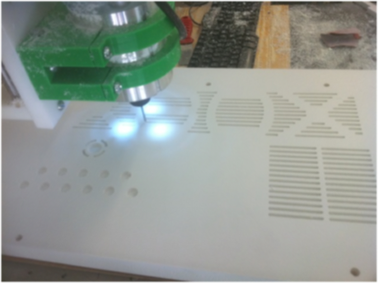
The router worked great, and I am sure I will post something later about my new CNC, but I do want to talk about it a bit here. It was interesting learning the different bits, and how much manual work is still involved, like sanding and positioning the materials, and a lot of trial and error! The machine worked rather well, although I did run into some problems. All is good now, and I feel very confident in my CNCing abilities! Great first project! Check out the video here of the router in action.

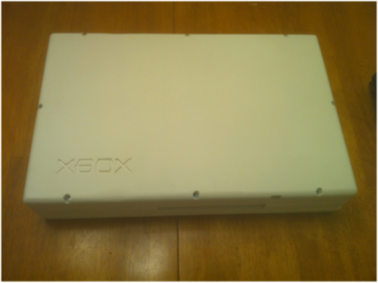
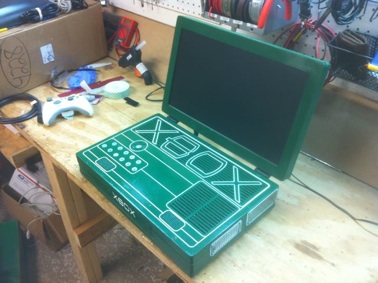
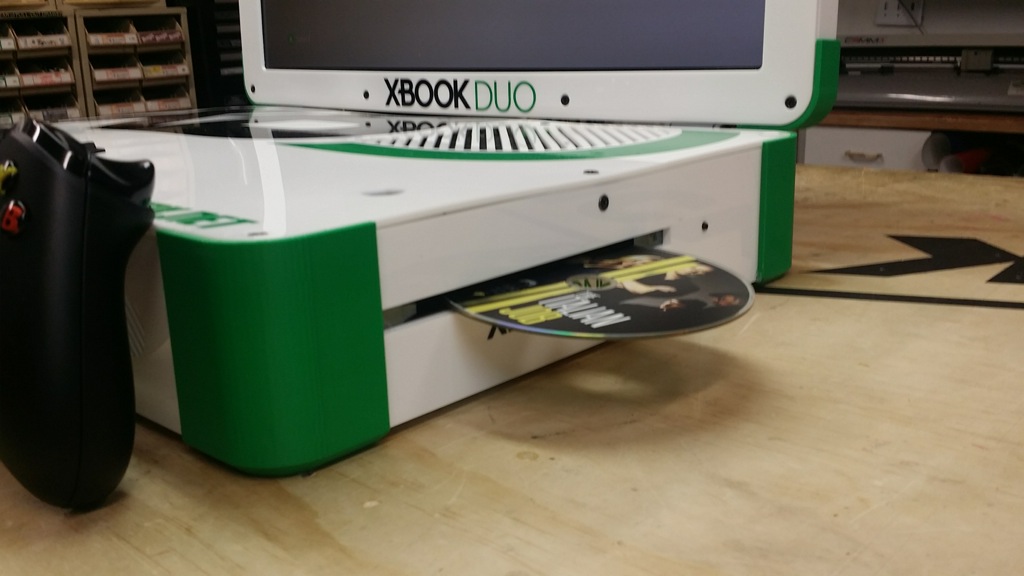
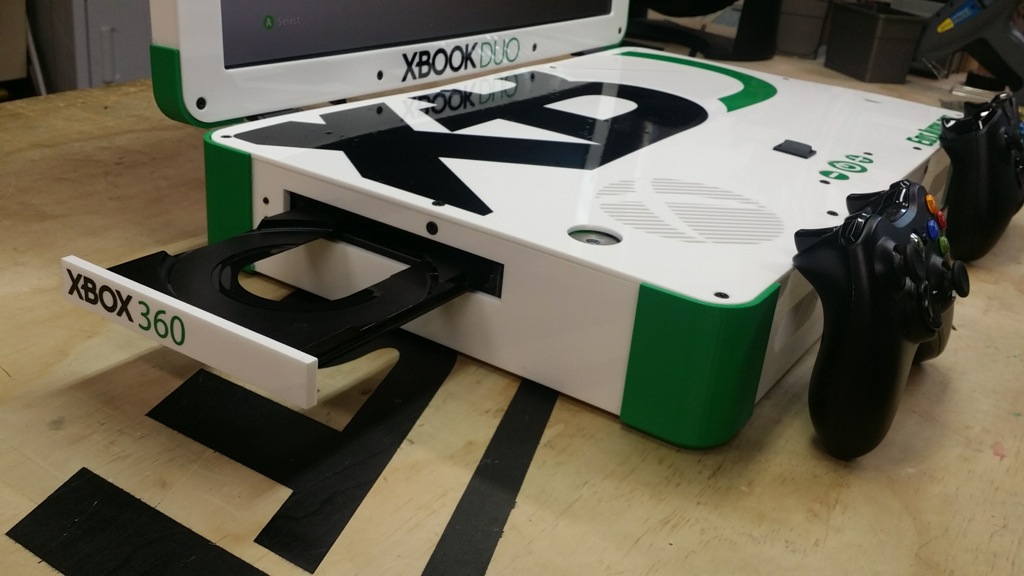
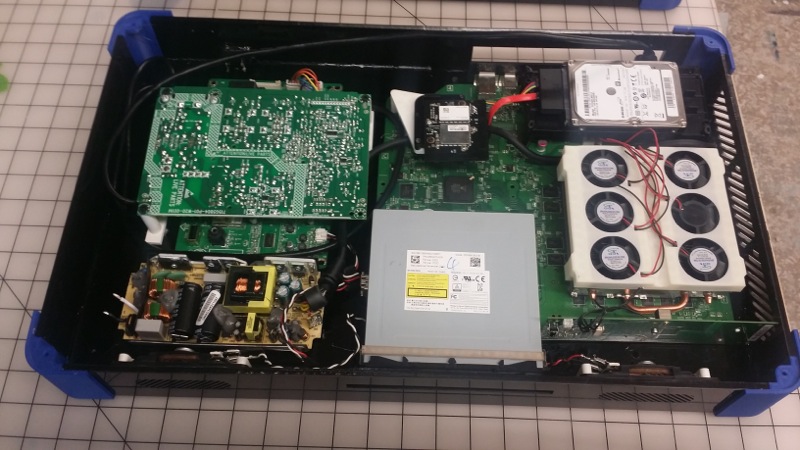
(yes, the DVD opening is not correct here, I fixed that after I took the pic)

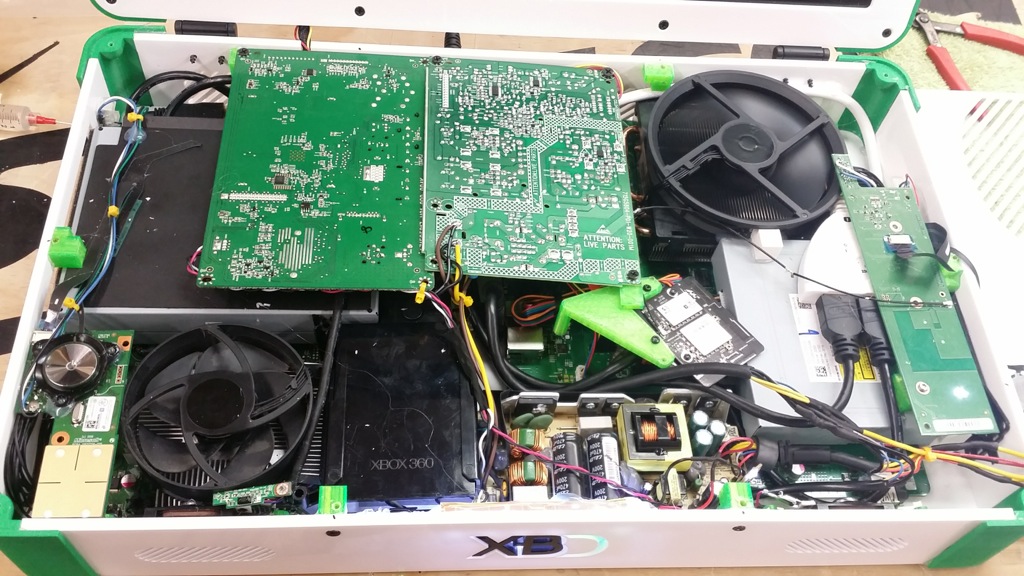
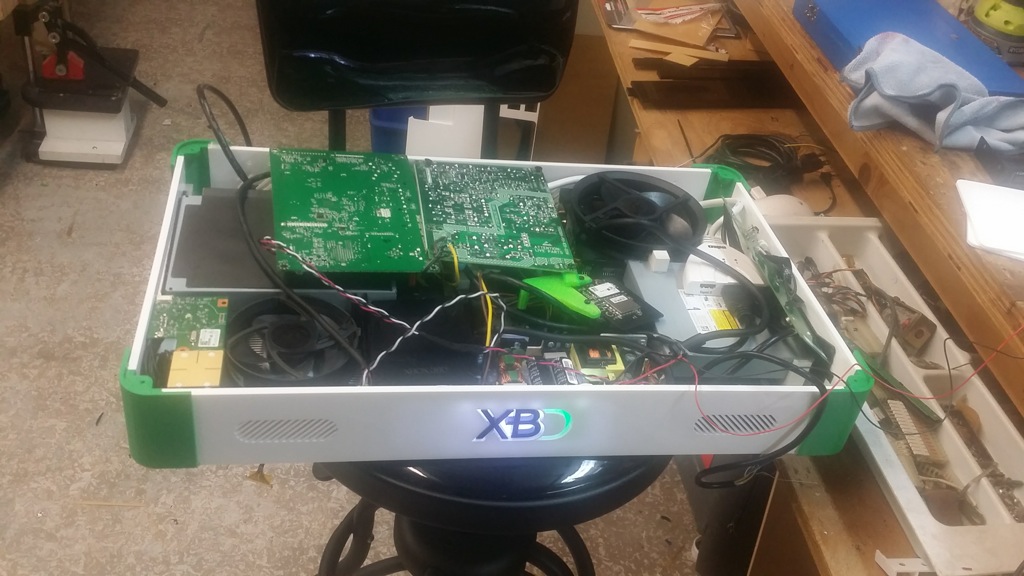
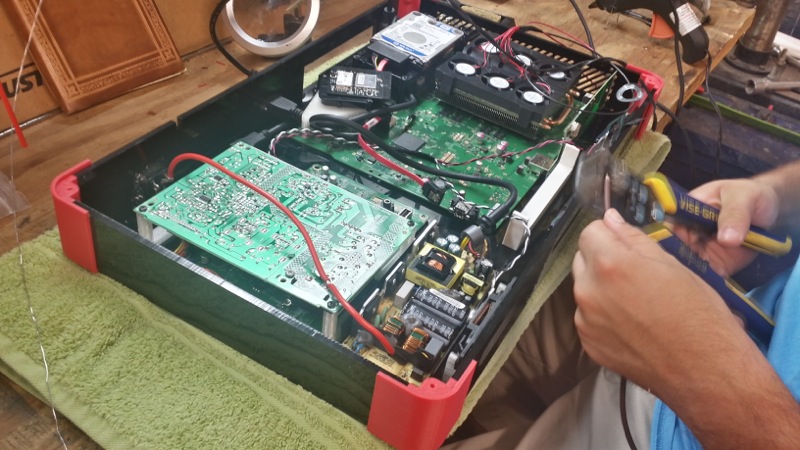
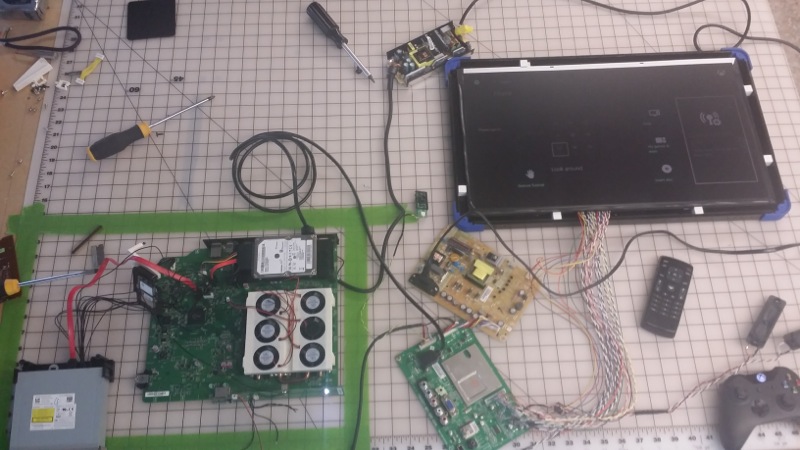
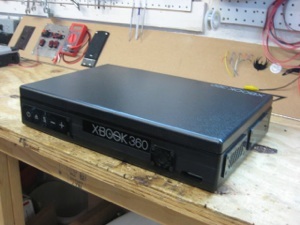
Now I went onto placing the parts inside of the case. Still, even with the DVD drive here, the FAN on the CPU is the highest point. I left the metal casing, only because it helps with heat problems, and keeps everything aligned quite well. Plus a big positive with this way is you don’t need to extend near as many cables, most stock lengths work (except for obvious things, like ring of light and USB ports).

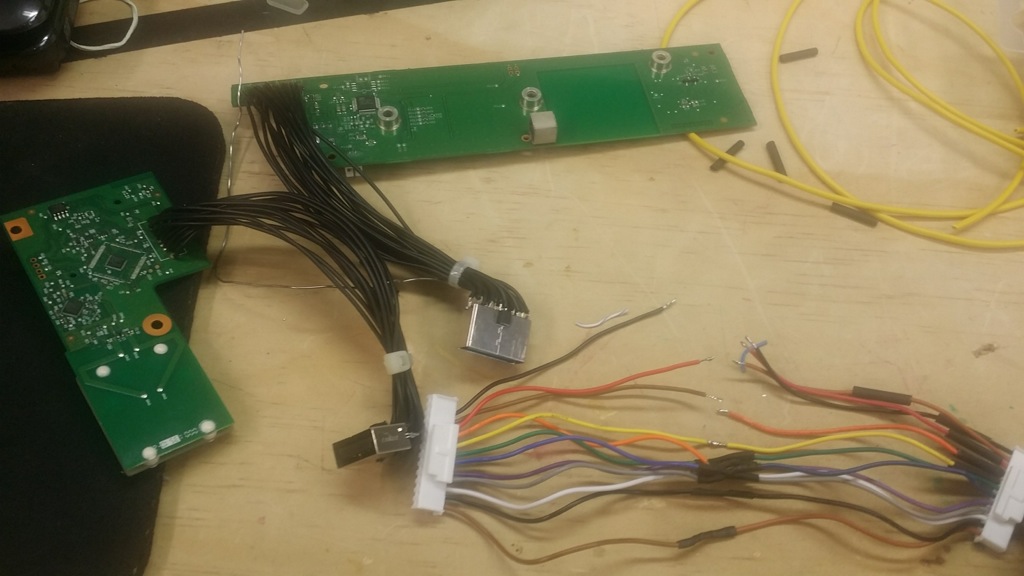
After getting all of the pieces together, soldering all my connections on the board, and hooking it all up…. Of course it didn’t work! What would a project be without trial and error….. and more trial and error.. and more…. But after many days of playing with things, discovering what works and what doesn’t, I took it all apart and painted it.

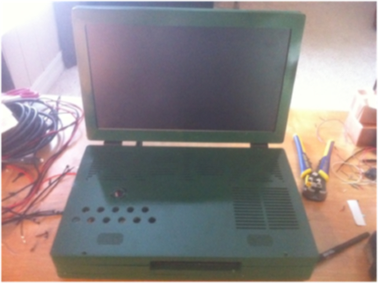
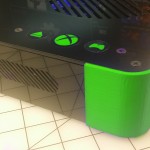
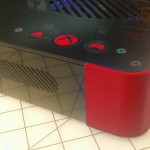
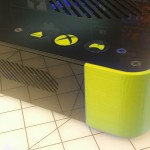
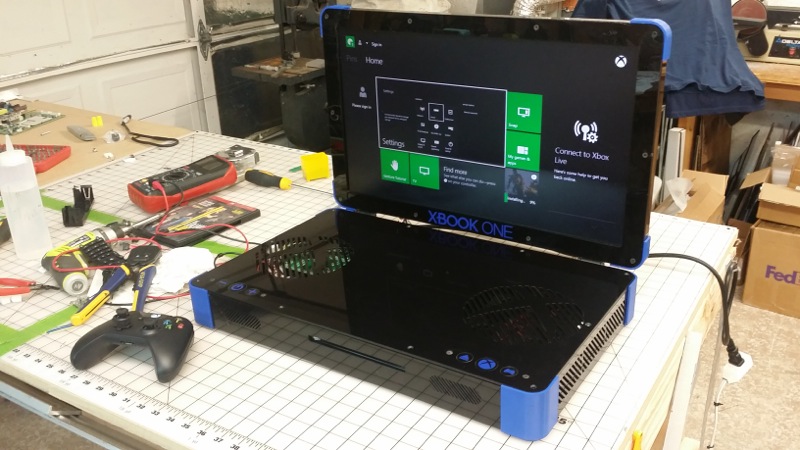
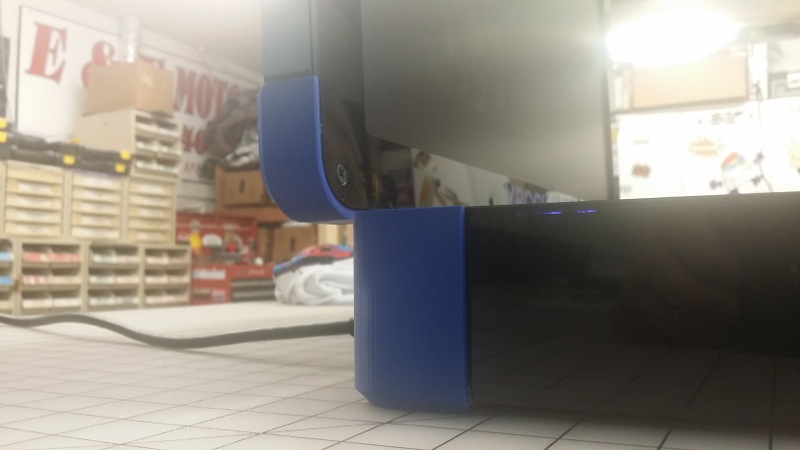
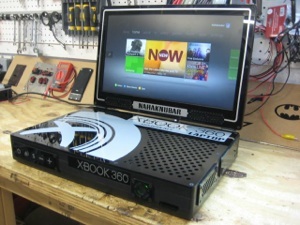
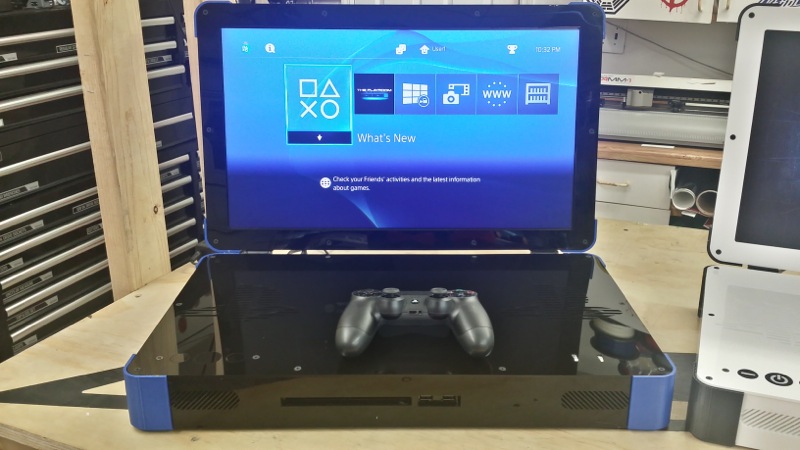
I went with a dark green on this one, which I think is pretty sharp, I then went and etched it again with my router, which gave me nice white pinstripes. And then I also added some LEDs to the inside the give it a nice glow and backlit the buttons (not perfectly backlit buttons, but I like it)

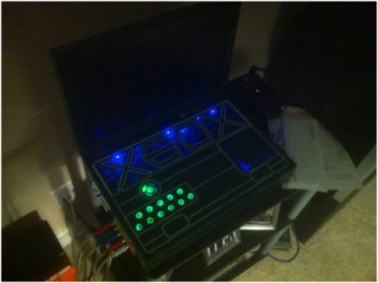
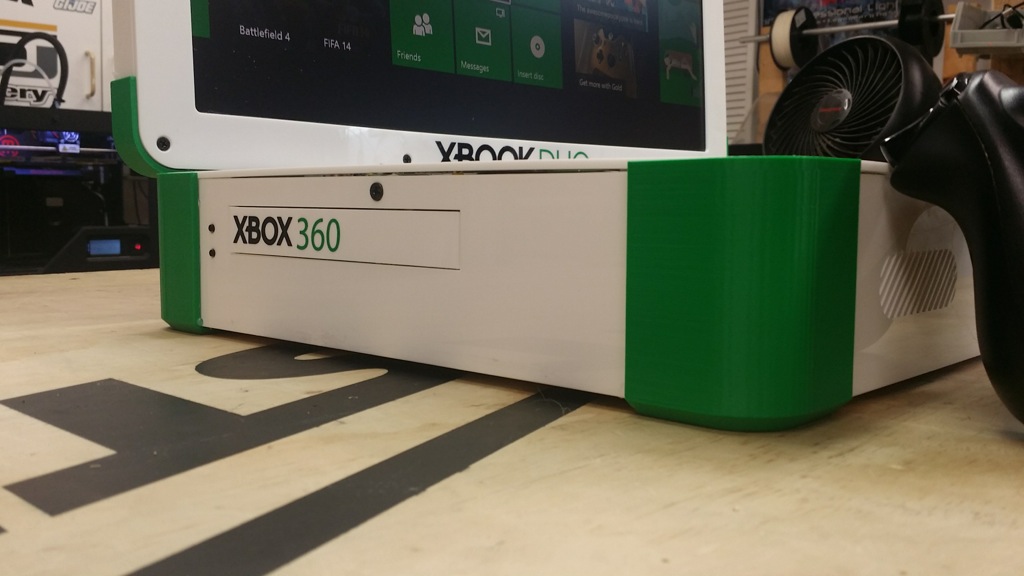
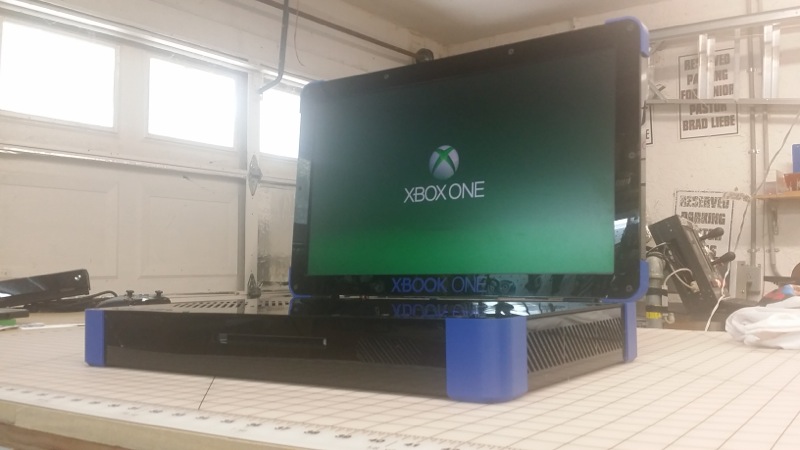
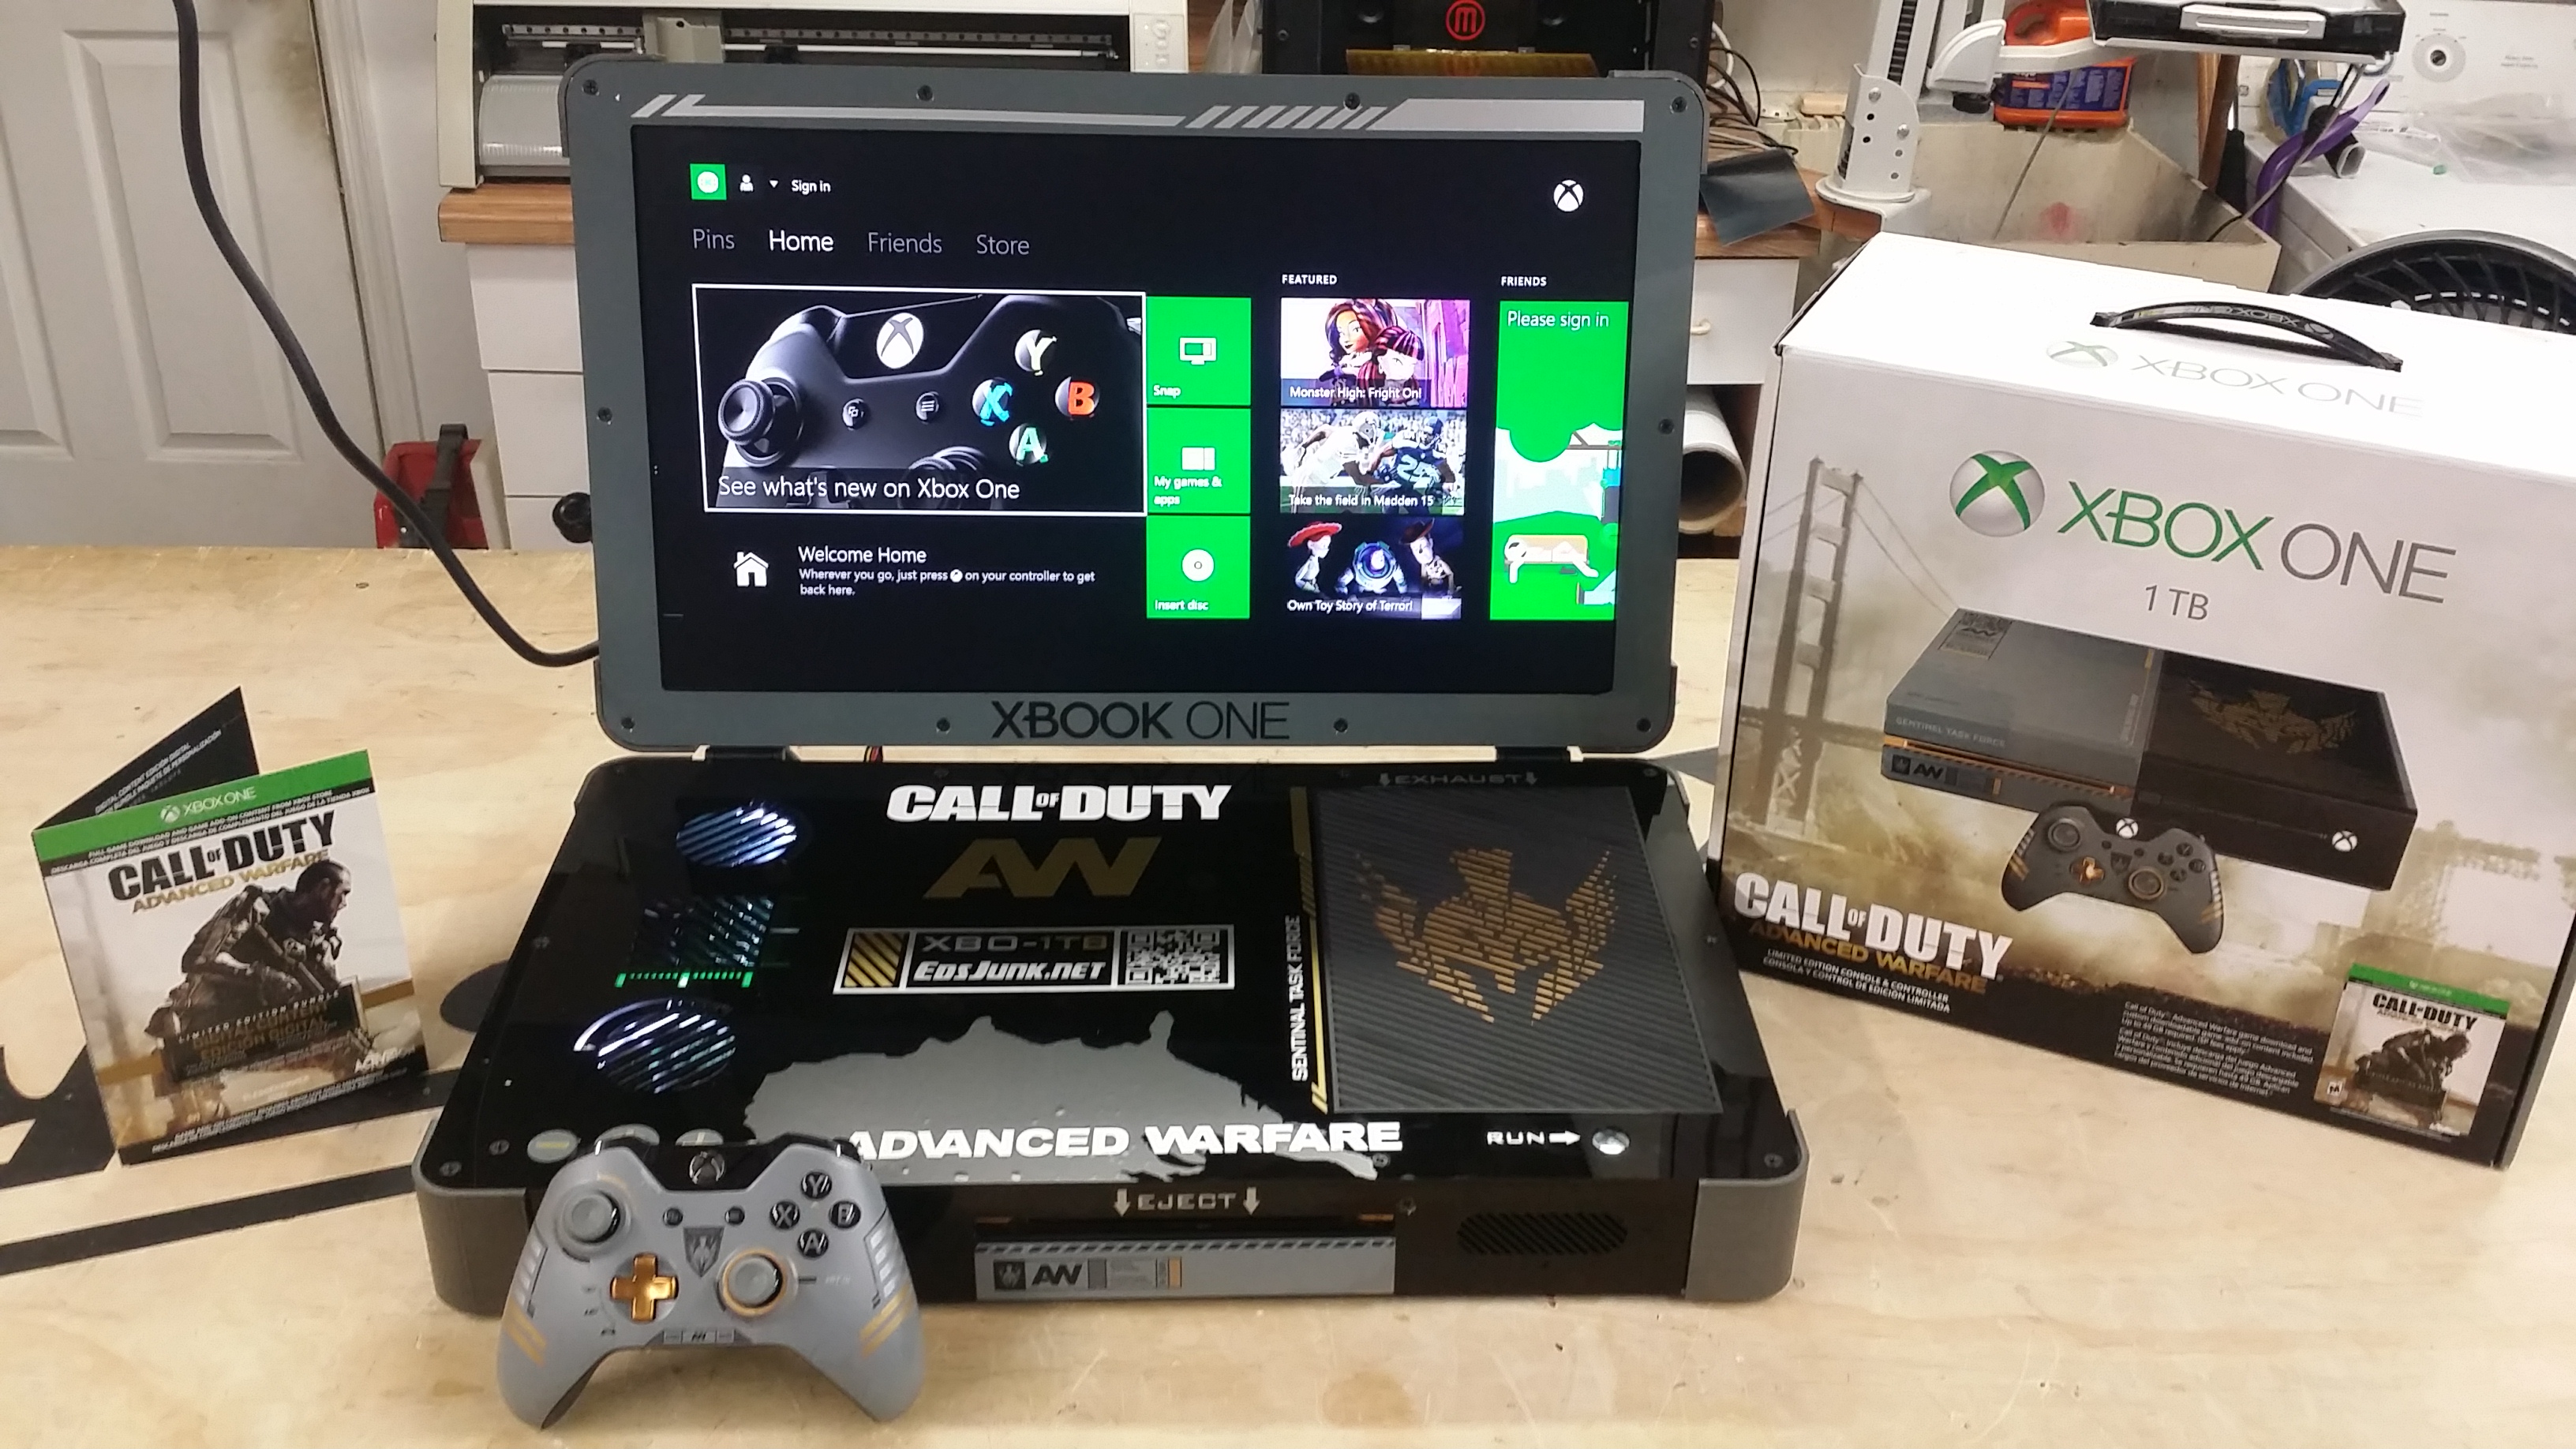
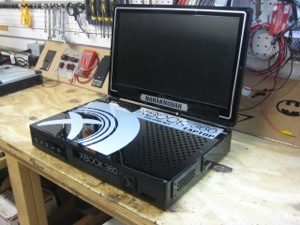
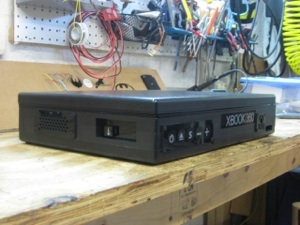
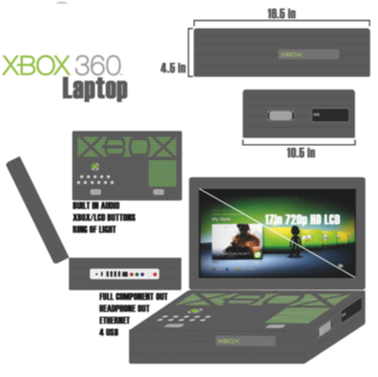
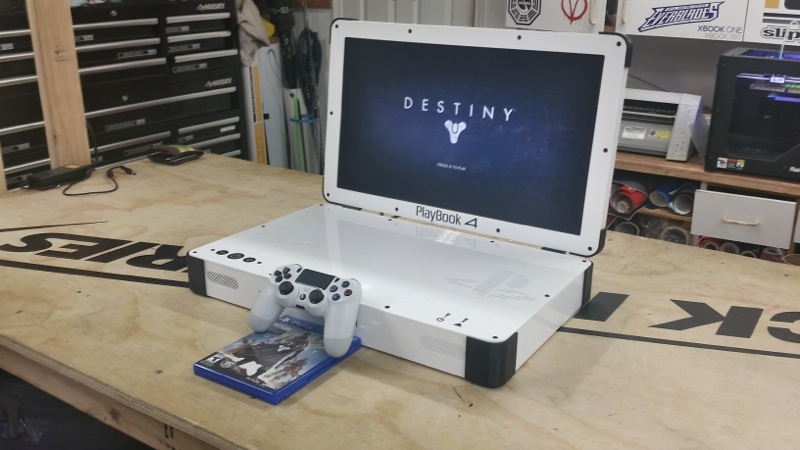
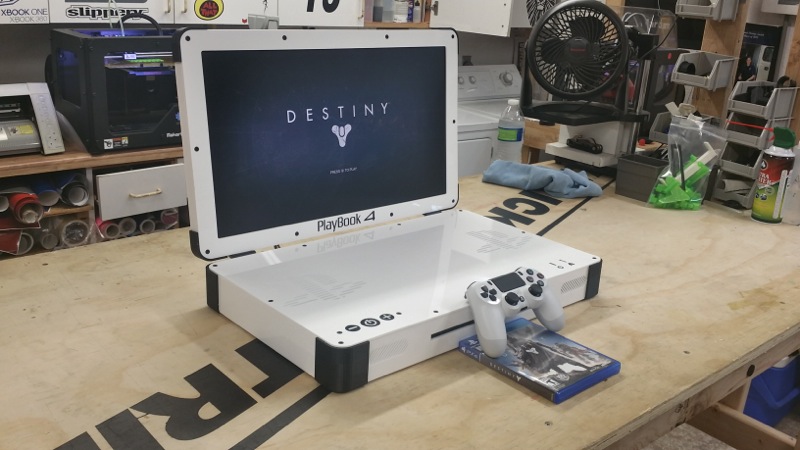
The ring of light is extended nicely, and all of the XBOX functions, audio controls and the LCD controls are all on the bottom portion of the laptop, and in the picture above, are all backlit. The speakers sound great, and as an added bonus there is a headphone jack that mutes the speakers automatically whenever a pair of headphones is plugged in. There is also the component on the side with a switch that chooses either the built in LCD or external component (sorry, impossible to display both at the same time). There is stereo audio out that is always enabled and is not amplified (so your stereo can amplify without any damage!). There are 4 USB ports on the side also that extend from the board along with the Ethernet port. Sorry, no kinect port is extended.  The Hard Drive is accessible by only removing the cover with 4 screws. You can pull it in and out like stock. Also, the “power brick” is internal. So the only cable you need is the black “universal power cable”. Makes hauling this around a breeze! There are no batteries in this unit, although I have not tried to put any in, but both of these devices (LCD and XBOX) are not made with any power saving features, so the batteries would not last long and would only make it heavier.

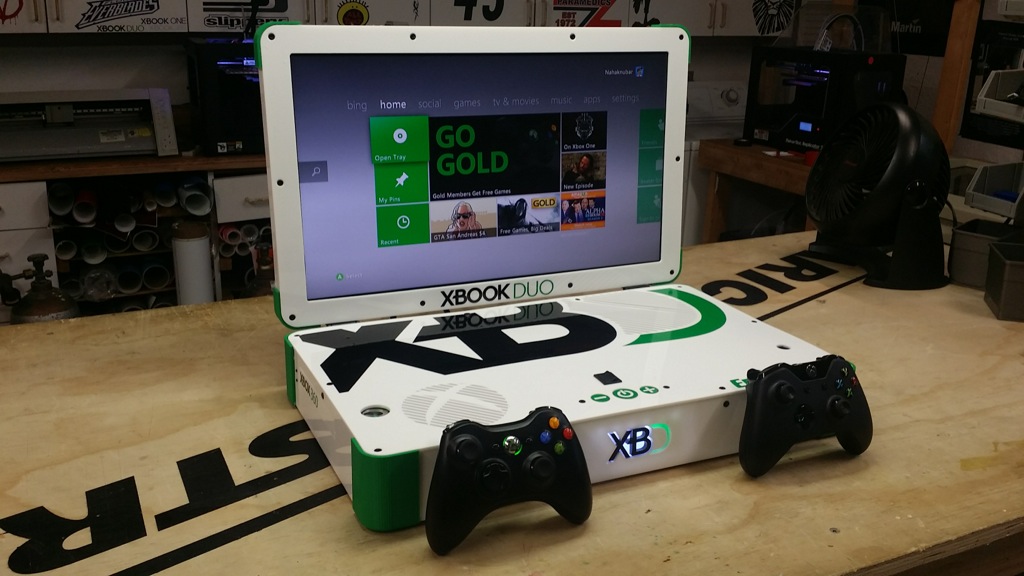
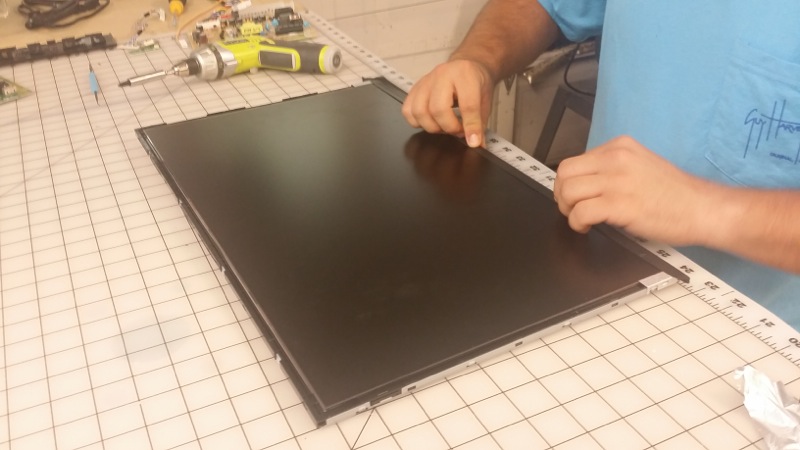
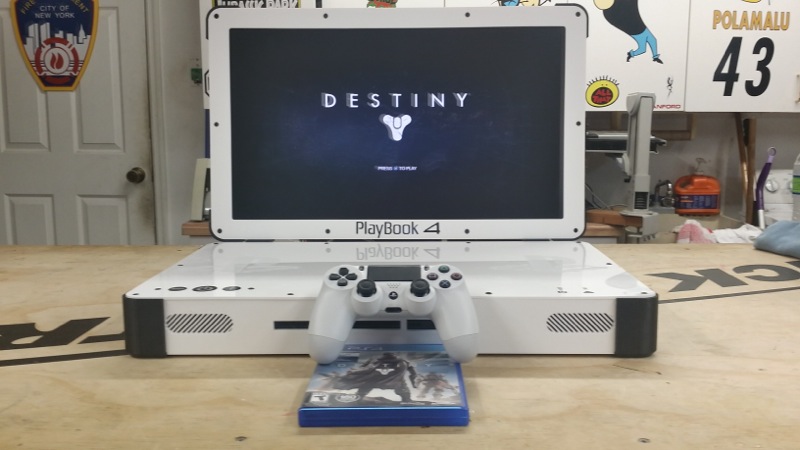
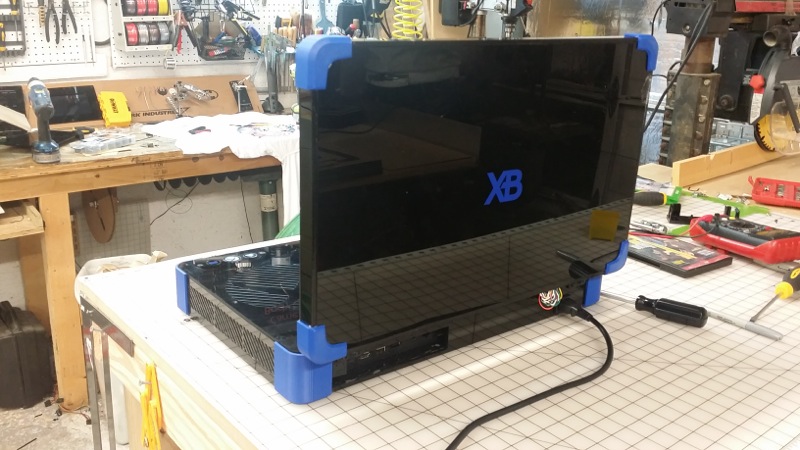
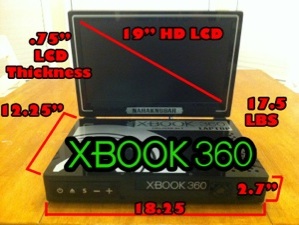
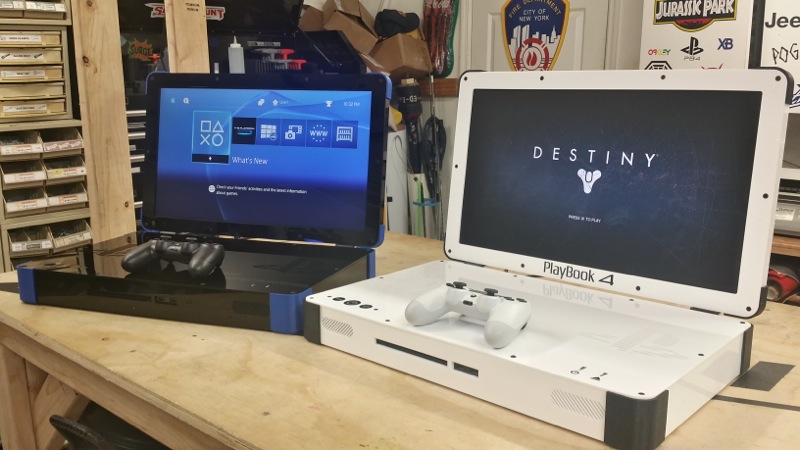
The screen is a 17” LCD that is very bright and very crisp. It has a native 720p Resolution and is a perfect size for this laptop.

I’m sure I could have made it thinner, but the work involved to save maybe a total of an inch was not worth it in my opinion, It would have made the price jump up a lot higher as well to you! So this is better for both parties involved! It’s approx 16.5×10.5×4.5. It has a 17” LCD HD 720p Internal display along with Internal Amplified Speakers, Component out, 4 USB, Ethernet, and a headphone jack. And since this is the XBOX 360 Slim, it has built in Wi-Fi as well. Which is great! No external antennas!   I can promise it’s not a pain to carry around; it feels sturdy and makes for quite the bragging conversation and LAN parties!

Now for the fun part, how much it will cost!

I purposely built this unit to be easier to put together than other ones I have seen to keep cost low for both of us. A lot of time is involved still and especially in all of my initial startup times. I am not looking to take advantage of people and charge too much. But I cant give it away either. I can promise it is a fraction of the cost of others I have seen for sale. I can also do discounts if you can provide an XBOX (must be a 360 slim) and/or if you don’t want some of the features, like LED and Component/Audio out ext.

So for the whole setup you see (4gb)

$1600.00

If you provide your own XBOX (360 Slim)

-$200.00

No LEDs (Vent lights and Backlit Buttons)

-$50.00

No Component Out

-$50.00

No Paint

-$100.00

Extras

250 GB HDD XBOX Slim (Extra Cost of unit)

+$100.00

Custom Logo engraving (see below)

FREE

1 Wireless Controller (if I provide XBOX)

FREE

Shipping

In the United States (exc. Hawaii and Alaska)

$50.00

Outside of the United States (inc. Hawaii and Alaska)

Email for quote

If you decide to purchase one, I can guarantee the process to be personal and will try to custom engrave any logos you would like (NO COPYWRITED LOGOS). If you have a clan tag, or your name ext, As long as you can provide a detailed picture or vector, I can etch it into the laptop (like the XBOX logo) If you would like other words on the air vents, talk to me, we can see what we can come up with. You can choose the paint color, button colors, vent colors and LED Colors (to an extent) as well. Ill admit the paint is not perfect, it is honestly spray paint with high gloss. It is not horrible, but I am not a professional painter. It does not look bad white at all! But please note, if you don’t paint it, the logos that are etched white, with be “white on white” Still looks cool, but not as noticeable.

I will work closely with you and do my best to make sure you get exactly what you would like. But please email me with ANY questions you may have and then you can decide if you’d like one!

Depending on how many orders I have lined up and supplies available will depend on how fast you can receive yours. To just be safe, count on two weeks after I start yours (could be sooner, but like to estimate longer). But if you want to be put on the list, you must send me half of the cost, which is non refundable, to pay for supplies and time, after it is finished, the other half will be expected along with shipping. Once all is received, it will be shipped out UPS and should get to you within 3-5 days.

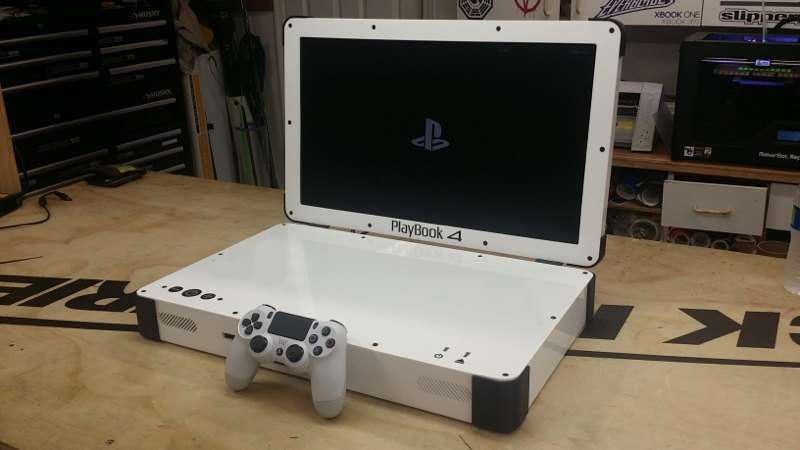
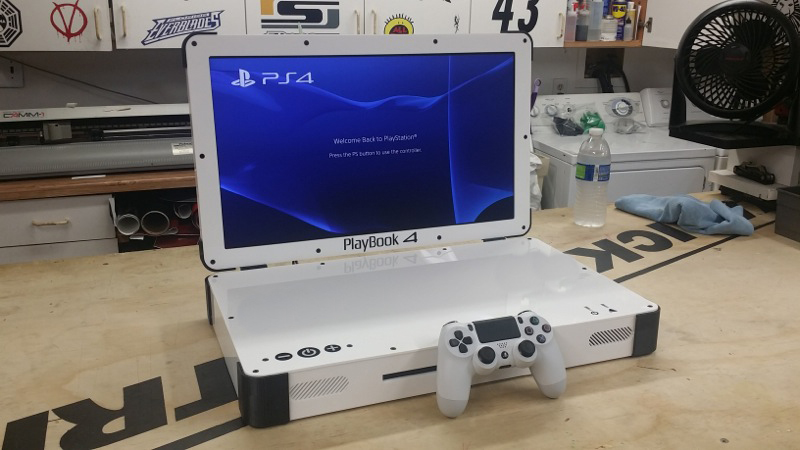
I DO NOT HAVE ANY PS3 LAPTOP PLANS RIGHT NOW. Maybe in the future, or if you want to pay more (significantly more) to have one made specifically email me.