


Ok, so its not as crazy as this picture, but I still think its a bit overkill for just a couple hours….. but doesn’t mean I wouldn’t do it again! Was great and was non stop for hours. I don’t play videos games to much, but sit me down in front of a 52” LCD with 10 other people playing COD, and you got me hooked! Check out the video!
Archives for : Mods n Hacks
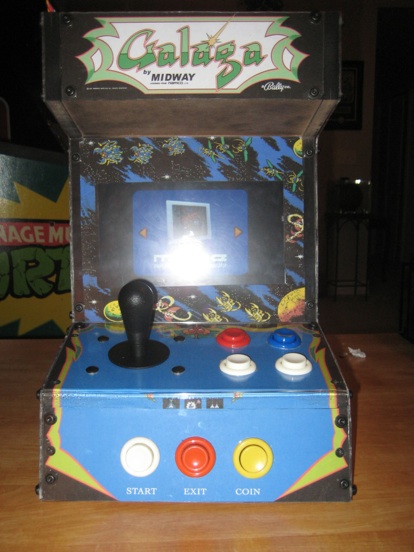
Well this time I have done something that has done before, but I believe I have a improved version! A Mame table top cabinet running off of a netbook pc (Which is also battery powered!). This is a Christmas Gift to my Aunt, Uncle and there Kids. I have produced MAME Machines before, but this one was completely from scratch. My others I have taken original Cabs and stripped them empty and added all of the components (NBA Hangtime Cab). This one I used 1/2 MDF board and built this off the top of my head. I already had the netbook, so I based some of my measurements from that.
Supplies Needed-
-1/2 MDF (3/4 could work as well)
-Plexiglass
-Netbook (I used a eeepc 901)
-iPac 2 Player ( Link here to Ultimarc.com )
-Buttons and Joystick (Link here to Happ Controls)
-Label Paper (Full page @ local Office Supply Stores)
-Assorted Tools, Wire and Screws
-1 1/8” hole saw
First I started off tearing apart the screen on the netbook. This allowed me to get some exact screen measurements so I could be sure I would have the clearance. Sorry I do no have any pictures of this, and since every netbook is different, yours probably will be. Just take a quick google search if you not comfortable doing this yourself.
After determining the dimensions, I cut out my pieces with my MDF board. I made all of the pieces and predrilled the holes so it would not split. Then, using a router, I cut out the plexiglass using the MDF as my stencil. Plexi is hard to cut, so go slowly.
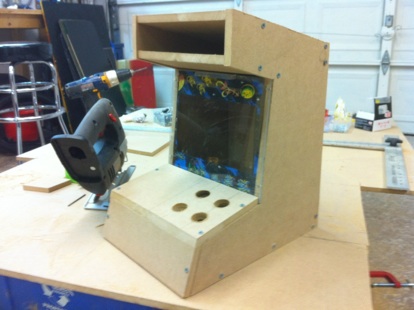
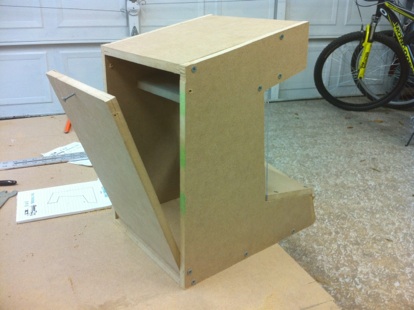
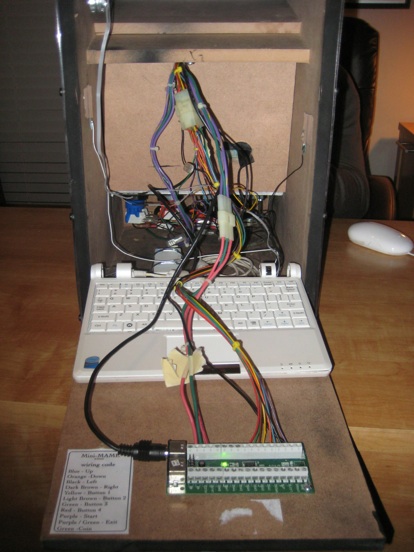
I left the back to swing open so it would allow me to work on it, but also to be able to access the body of the netbook. This gave me a mouse and keyboard always on inside of the machine. I also went ahead and predrilled the holes in the wood for the controls and joystick. (not all are done at the time of the picture). Also as a side not. Dont try to cut the plexi with a holesaw, doesnt work as well as you would like. I applied the plexi to the machine, then use d a dremel with a cutting bit. This acted like a mini router, and cut the plexi perfectly. I then removed the plexi and painted it black.
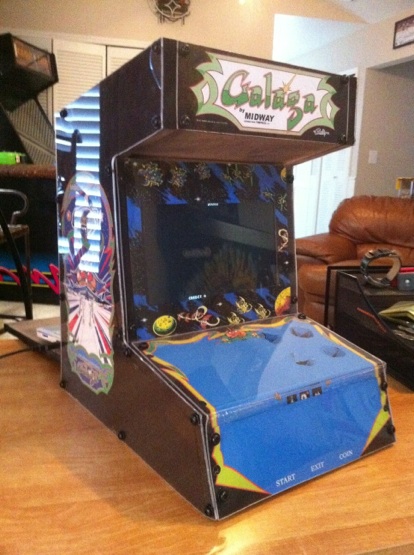
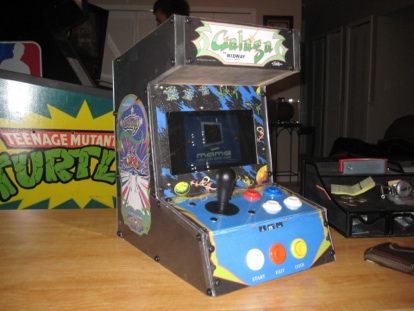
And then had to add artwork. I am giving this as a gift to my uncle and his kids, so I went with a Galaga theme. He has always said he wants a Galaga Arcade cab :-). The graphics I used are HERE (Arcade Art Gallery). But you can obviously use any art work you would like! I then reapplied the plexi over top of the graphics to give it a glossy look, but also protects the artwork from wear.
Then I added all of the buttons and wired them up. This is an easy process. Once you get the Ipac, youll see that they make it very user friendly. I went ahead and added molex connectors to make it easy to disconnect things if I ever had to. After adding the controls, I went ahead and wired up and mounted the LCD from the netbook. This was actually easy. I just took a piece of MDF, cut it to fit where the screen would go, then i set it back the same as the screen is deep. This allowed the screen to be flush. I used the stock mounting hardware and screwed it right to the wood.
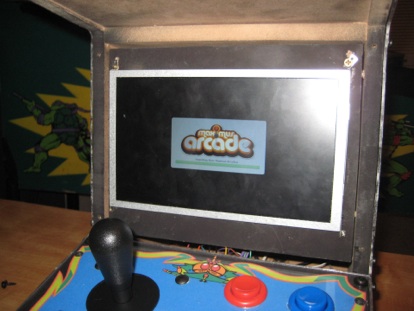
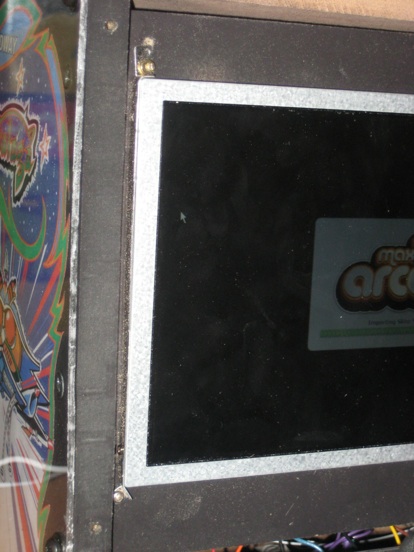
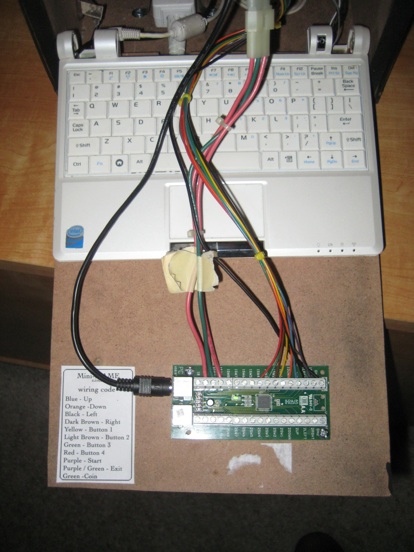
I also cut a hole in the MDF right behind the connector of the LCD so I could easily run it right to the computer. I mounted the computer directly to the back of the cab that is hinged for access. There I also mounted the ipac and a wiring diagram. As you can see in the picture below, there is no room to plug a USB cable into the computer. So I soldered it directly to the board. Very similar to my LCD Apple Logo project. (link HERE). I also added a power button to the top of the cab and soldered it directly to the board. Makes it easy to turn off and on.
That is pretty much all that is needed! I am using Maximus Arcade (link HERE) to run the machine, which I highly recommend. Makes having multiple emulators and easy task! Now just enjoy! have any questions, send me an email!
As seen on:
So here is the Tutorial for the Mod to turn your Apple logo into a LCD Secondary Monitor to display anything you want!
Again, this MacBook is on eBay for only 850.00. (HERE) My high bidder did not follow through and pay, so it is on eBay one last time. I will keep it if it doesn’t sell this time.
List of Materials
1. MacBook (either Black or White, not sure if the new uni-body macs will work)
2. Century Japan 4.3” USB LCD (LCD-4300U) I have some on ebay HERE(LOWERED TO 135.00 from 200.00!)
3. USB LCD Mac Drivers by Display Link (HERE)
3. Clear Apple Logo from ibook or powerbook (Get them on ebay or HERE)
4. Solder and iron
5. Misc Tools
Guide
First off you need to get the drivers installed on your computer that you will be using and make sure you get the LCD working first. This is very simple, just download and install them and then plug in the USB LCD and it should act as a secondary monitor.
Ok first off you need to go ahead and disassemble your MacBook. Yes.. this WILL void the warranty. Use the guides at iFixit to remove your Logic Board and Screen (HERE). You are going to need to remove the screen from the bottom half of the computer.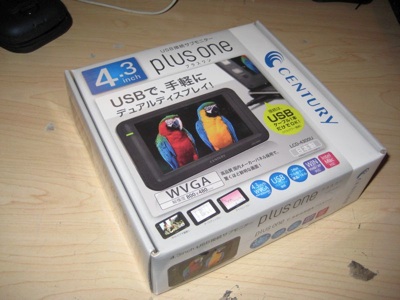
Ok first off you need to go ahead and disassemble your MacBook. Yes.. this WILL void the warranty. Use the guides at iFixit to remove your Logic Board and Screen (HERE). You are going to need to remove the screen from the bottom half of the computer.
It does seem thick, but there is a lot of unused space in there!
Go ahead and take the LCD and Video card out of the case. You will not need the case anymore after this. Here is the two pieces.
Top-Video Card, Bottom-LCD
Now take the provided USB Cable, Cut the larger end off and you are going to need to strip it all the way down to the 4 wires (green, white, red and black). You will even need to strip down the plastic that covers the plug on the end of the cable.
Now after you get all this stripped down, go ahead and plug it everything together. Plug in the LCD to the Video Card with the ribbon cable. Then connect the newly stripped USB into the video card and splice it back together real quick with the end you cut off. This is going to be just a test to make sure the wiring is still all good after stripping since you will be soldering it onto your Logic Board later. You should see a picture on the LCD.
(ignore the MacBook nano, its just a MSI Wind).
You should get a picture. If not, make sure your cables are all the same length. I had some issues with it not working if one was shorter than the other.
Ok now you need to go ahead and disassemble your MacBook. Yes.. this WILL void the warranty. Use the guides at iFixit to remove your Logic Board and Screen (HERE). You are going to need to remove the screen from the bottom half of the computer.
Get down to the Lid of the macbook. Remove that white material and that like cushion stuff and get rid of it and get down to the logo. You need to pop off the Apple Logo. You will notice it is painted white on the inside. You have a couple options. One you can wetsand and buff out the paint or you can replace it with a logo from a ibook or powerbook. It works out really well since back then apple left the logos clear. Super glue this logo down and let it sit for a few minutes.
Now time to put in the LCD. Arrange it how youd like, but I recommend doing it like this. Make sure you get the screen centered with the Apple logo.
As you can see I just used tape to keep it down. This works really well because you an adjust it if you didn’t get it right the first time and also it helps to keep the board shielded from any contact you wouldn’t want. Go ahead and plug the usb cable in and run it threw the hinge on the left if your looking at the computer normally when you use it. Leave some slack inside of the screen and go ahead and screw your main LCD back down. Be aware, this is where you are going to notice the flexing of both the LCD and Lid. You are cramming another screen in a area not made for a screen. Mine is fine, it bulges out a bit (as seen in this picture) and you can see some minor flex to the LCD when it displays a black screen. But you cant notice ANYTHING when its showing a picture.
There is a way around this by dismantling the 4.3 USB LCD even more by removing the USB plug and soldering directly onto the video card and also by removing the board on the 4.3 LCD itself. This is the way I believe this can be done on a MacBook Pro. It will just take a little more work and some patience.
Now run the wires out to the logic board. You are going to want the wires to be under the logic board when it is installed back into the mac. So Just have it laying next to the mac, upside down, so you can solder onto it and just flip it back into the macbook. Solder in this order a shown in the next picture.
Make sure you cut all the extra slack off and make sure they are kept the exact same length. Now, yes you will lose this USB port. Whenever you plug something into it itll power off the back screen and not power your device. (at least that’s what’s happened to me). If you can find another source of 5v power on the board that should do fine! But im not that good . Now go ahead and put the macbook back together and go show off your new project! Im sure it will get peoples attention!
You can purchase the LCDs and this MacBook on ebay. This will be the third time Its on eBay. This first time ebay cancelled the auction due to a Policy issue on links, second time my high bidder bailed out. So now I am going to try once more, if it doesn’t sell, im just going to keep it! The LCDs I am selling are the right ones, if all of mine sell, there are others on ebay for a little bit more from China. Just search LCD-4300U. Mine are in the US and will be shipped quick! Email me on this websites contact page if you have any questions or concerns!
Appeared on :
ok so here is a tutorial on how to pull this off. It is relativly simple, but does take some patience and time… it took me approx 4 hours to complete.
First of all here are the supplies that I used, you may have alternatives but this is just a guideline.
-a clear Apple logo that they use on there laptops (I bought a old ibook lid off ebay and got it from that)
-a diffusion type material (some of the apple logos have this already on the back of them, i think all the macbook apple logos do)
-dremel tool and or files.
-masking tape
-spray paint
-800-1000 grit wetsand paper (make sure its the wet sand paper)
-superglue
-misc tools to remove lid
here is the clear apple logo im talking about..
ok.. first remove the lid. To do this, remove the 4 rubber pieces on the screen bezel, beneath them are screws.. remove them. and carefully pry up the bezel. Now remove the final two screws that hold the screen to the hinges. After these are removed the LCD and lid will be separated. Go ahead and take up the clear yellow tape from the LCD connection and unplug it and put your LCD to the side. Now carefully remove the camera, mic and two antennas from the top of the lid and carefully remove all of the wiring.
Now that you have that seperated the lid, you need to cut out the center of the foil/black padding. I took out probably a 4″ by 4″ square, but take out what you need. Now put some masking tape on the INSIDE of the lid and trace the apple logo on it. (Make sure its centered!)To do this, I used my ibook lid i purchased and used the hole on that to trace my logo (MAKE SURE YOU DO IT MIRRORED! that way it will show up right on the outside of the cover). Now you need to cut it out. This is the most time involved process. I used a drill out of the center and dremmelled out the logo and used files to get the smaller and more precise parts of the logo. TAKE YOUR TIME HERE! This is whats going to make or break this whole project! Keep putting the clear logo up to it to make sure your filing out the right parts. I personally messed up a few times and had very small gaps in some places after i installed the clear logo. But there is a easy fix to that by simply using a sharpie to paint the clear logo black on the lip that is used to glue it onto the lid… you really cant tell there are gaps if you do that becuase the light wont shine threw!
After you get the logo cut out and your clear logo fits in there, remove the clear logo and wetsand the whole top to remove the clear coat and MSI logo. You will notice if you centered your apple logo that it WILL NOT cover the “MSI” logo. So you gotta sand it out. This will also take some time, but has to be done! Make sure all the clear coat comes off and your down to the plastic.

Now simply paint the lid and glue your logo on! WOW! looks good! Also, go ahead and apply the diffusion material over the back of the clear logo. This will cause you not to see shadows or the LCD wiring. You can even threw colored plastic in there to get a different color apple!
Now your only half done.. next comes to part thatll make you sweat…. Cutting away the plastic and foil that keeps the back light from shinning threw the back of the LCD. So grab that LCD screen..and make sure you are careful! there is going to b some tape foil towards the bottom covering up the circuitry. Cut away all that you dont need, just leave enough to cover the circuit board. go ahead and tape off any openings and the connection because you dont want any dust getting in there. Now you gotta cut out a good portion of that white plastic cover. I first started doing it with a exacto knife, but took forever, so i used a dremel with a cut off disk. :-/ Towards the top of the LCD the white palstic cover kinda clips onto the metal frame. Carefully unclip the two, you will notice you dont get much play room. I got enough room just to lift the white plastic cover up a little bit so i wouldnt cut threw my screen. Now carefully cut about a 4″ x 4″ square out of the plastic. You will gete alot of dust if your dremel. but as long as you mask everything off, itll b fine.
Now you still will not have light shine threw, because as you will notice there is more silver foil blocking it. you gotta remove a square of foil and you will get light. but be EXTREMELY CAREFUL here. This foil is directly adhered to the material used to distribute and even amount of light to your screen! It comes off easily.. but it will take some time. I learned the hard way and cut threw the white material under the foil and it left very dark spots on my screen. I fixed it, but was not fun! Simply just take your time and carefully peel away enough foil. (removing just the foil does NOT affect your screen at all). After the foil is removed.. you will have light! Its a beautiful thing! and its BRIGHT!

Now go ahead and put all of your antennas, camera and mic back on the bezel, route the wires and screw it all back together. Remember that the screen goes onto the lid then the hinges ontop of that. Make sure you have no pinch points of cables by the hinges. reinstall the bezel and then clip the hinge covers back on. Now you got your very own glowing apple


Benefit over doing this than using some LEDs is you will have a even amount of light over your logo, not hot and dark spots. It will also save on battery life because your not running the extra LEDs, just your screen backlight. It will turn off and on whenever your screen is on or off.. just like a Apple. Also, no wiring is involved in this process! Hope it all works out and post any questions here! I love this mod!